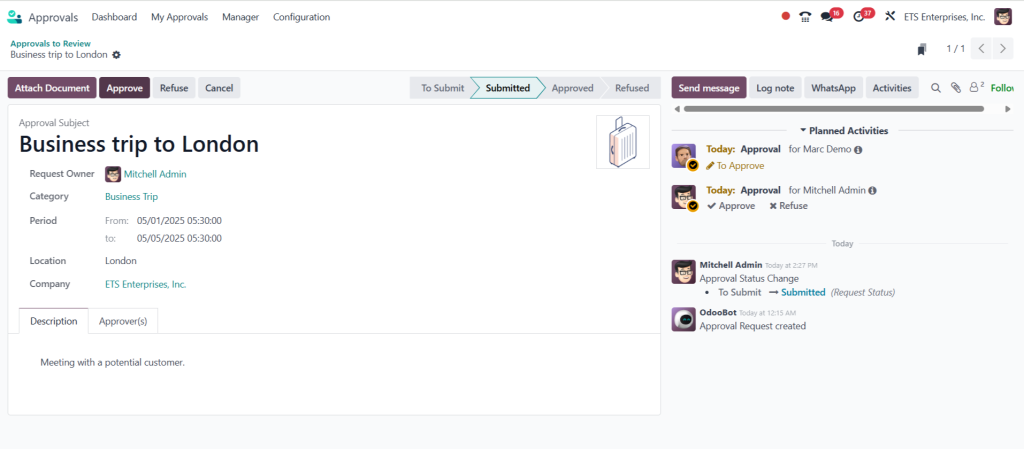
The Odoo 18 approval types feature enables organizations to automate approval-based processes for time-off requests and purchase orders and other business operations. The Odoo approval module provides transparency and control and compliance to organizations of all sizes.
Businesses in Odoo 18 can establish approval types and set up multiple approvers and approval rules that match their operational needs. This guide provides instructions for Odoo 18 approval management and Odoo approval workflow implementation and Odoo 18 approval process optimization.
The guide provides complete information to help new Odoo users and business workflow upgraders use the Odoo 18 approval types functionality.
Why Odoo 18 Approval Types Are Crucial for Business Success
The implementation of structured Odoo 18 approval types enables organizations to achieve operational consistency and control. The system enables automated decision processes which maintain team alignment. The main advantages of this system include:
- Odoo 18 approval types enable centralized approval tracking.
- Odoo 18 approval types allow users to configure custom workflows.
- Odoo 18 approval types generate audit trails to support compliance requirements.
- Odoo 18 approval types include role-based access control features with permission settings.
The Odoo approval module reduces human involvement while enhancing responsibility tracking and removing operational delays. Businesses that want to scale up their operations need Odoo 18 approval types as their essential tool.
How to Create Approval Types in Odoo 18
Step 1 – Activate the Approval Module
Begin by turning on the Odoo approval module through the Apps interface. Check for “Approvals” in the application store then install it if the module is not currently active. The Odoo 18 approval types become accessible after you activate this module.
Step 2 – Navigate to Approval Types
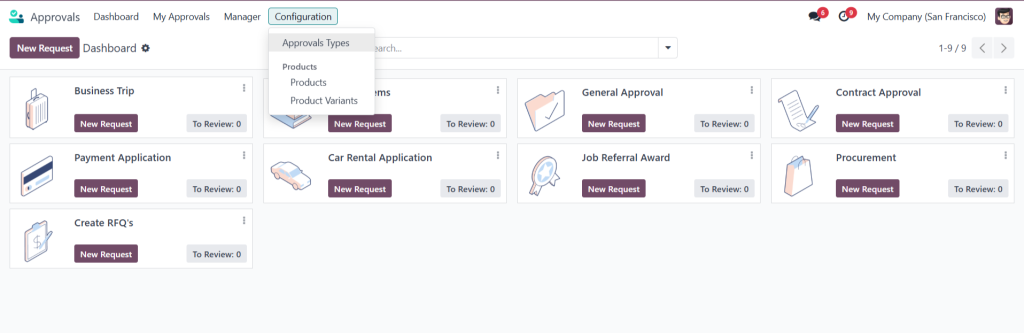
Approvals > Configuration > Approval Types is where you should navigate. The Approval Types page allows you to view existing types and make modifications or establish new custom Odoo 18 approval types.
Step 3 – Create a New Approval Type
Click “Create” and enter:
Approval Type Name (e.g., Business Travel Request)
Description (short explanation of the request purpose)
Required Fields (e.g., Amount, Reason, Date)
Approvers (Add users or departments)
The new Odoo 18 approval type becomes active after you click “Save”.
Manage Approvals in Odoo 18 with Efficiency
After establishing your Odoo 18 approval types you should focus on their efficient management.
Submitting a Request
Users access the Approvals > My Requests > Create page to select an Odoo 18 approval type before entering necessary details. The request proceeds to approver(s) after submission for their necessary actions.
Reviewing and Approving
The system will notify approvers about their tasks through Approvals > To Approve. They can:
- Users can approve requests through the Odoo 18 approval types interface.
- Users can reject requests through the Odoo 18 approval types module.
- Requesters can ask for extra information to achieve better clarity.
Each Odoo 18 approval type submission allows users to check request status along with audit trails and comments.
The Odoo 18 approval types system enables straightforward and transparent approval management within Odoo 18.
Customize Odoo Approval Workflow for Your Business
Set Conditions and Rules
Each Odoo 18 approval type can include custom rules. You can:
- The Odoo 18 approval types allow you to require multiple approvers.
- Set amount thresholds for automatic approvals
- Link to departments or user roles within Odoo 18 approval types
The flexibility of Odoo approval workflow using Odoo 18 approval types allows you to tailor it to real-world needs.
Link Approvals to Other Modules
Odoo 18 approval types can be tied into:
- Expense Management workflows
- Purchasing approval flows
- Employee Time-Off processes
The cross-module integration of Odoo 18 approval process makes Odoo 18 approval types extremely versatile.
Odoo Approval Configuration Tips for Better Workflow
The following best practices will help you achieve maximum power from Odoo 18 approval types and the Odoo approval module:
- Use clear naming conventions for Odoo 18 approval types
- Each Odoo 18 approval type should have approvers who have appropriate user roles
- Test workflows with dummy data before going live with Odoo 18 approval types
- Use email templates for automatic alerts
- Enable notifications for overdue Odoo 18 approval types
Proper Odoo approval configuration using Odoo 18 approval types helps in error-free implementation and smooth day-to-day operations.
Why Netilligence Is Your Go-To Partner for Odoo Approval Management
Netilligence delivers complete services for implementing and optimizing Odoo 18 approval types. Our certified consultants help you,
- Create custom Odoo 18 approval types workflows
- Odoo 18 approval types integration with other modules is possible through our services.
- Odoo 18 approval types require setup of user roles and access controls.
- Training your team for efficient use of Odoo 18 approval types
Netilligence provides complete Odoo 18 approval process solutions that are both scalable and success-oriented and seamless for new or existing setups.
Empower Your Business with Odoo 18 Approval Types for Seamless Workflow Management
The Odoo 18 approval types feature represents a transformative tool for managing internal workflows and approvals. Your team will achieve speed and clarity and control through the mastery of Odoo approval type creation steps and rule configuration and request management efficiency.
The Odoo approval module enables your business to manage HR and financial and operational approvals more efficiently. Netilligence serves as your trusted partner to help you maximize Odoo 18 approval types and optimize your Odoo 18 approval process.
Step-by-Step Setup Guide for Order Approvals Module
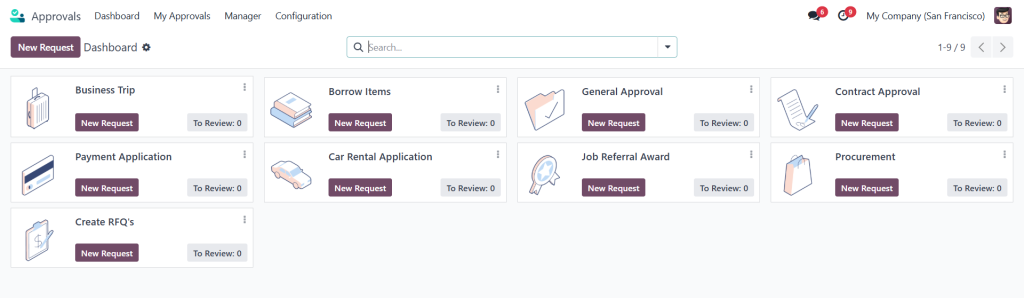
Step 1: Access the Approvals Module
- Navigate to the Approvals Module from the main dashboard.
- The dashboard will display examples like:
- Business Trip approvals
- Payment applications
- Quotation request approvals from vendors
- Business Trip approvals
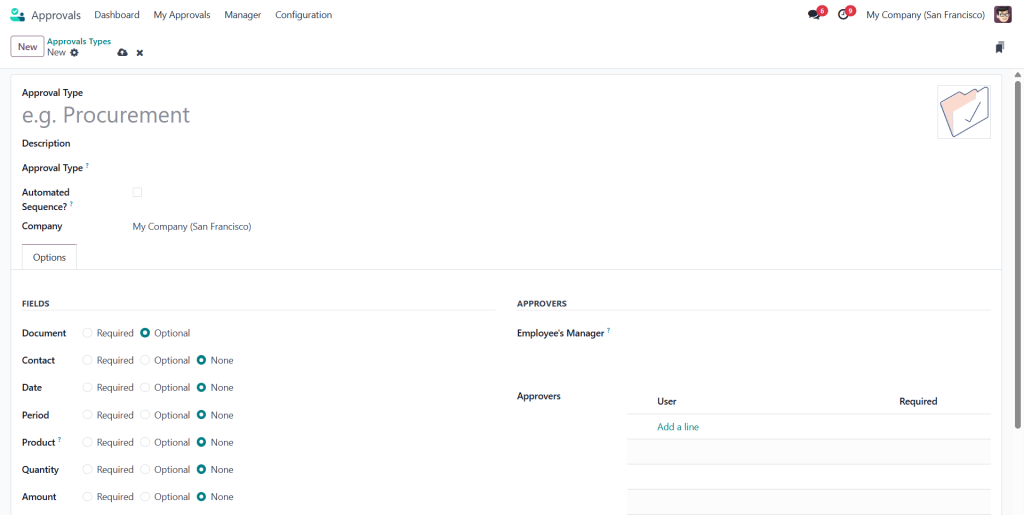
Step 2: Configure a New Approval Type
- Go to the Configuration menu ➜ Click Approval Types
- Click “New” to create a new approval type
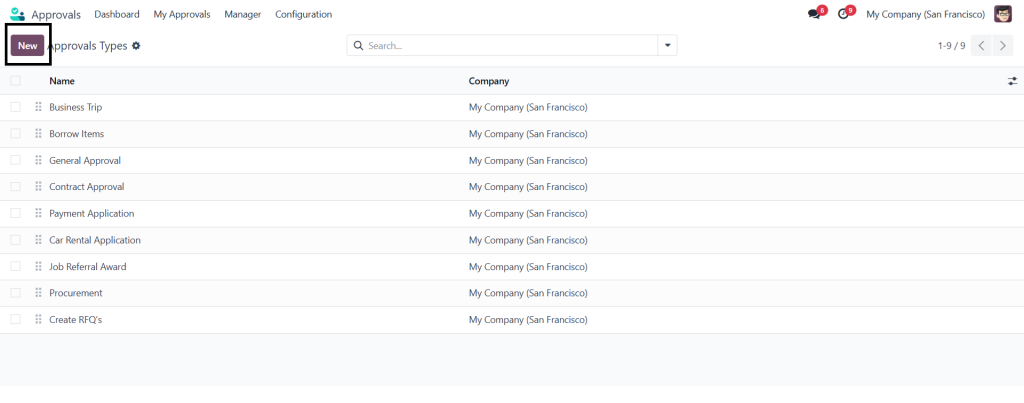
Fill in the form:
- Name of the approval type
- Fields required for the request (e.g., trip details, destination, amount)
- Approvers: who must approve this type of request
Once completed, click “Save”.
Your new approval type will now appear on the dashboard.
Step 3: Customize Existing Approval Types
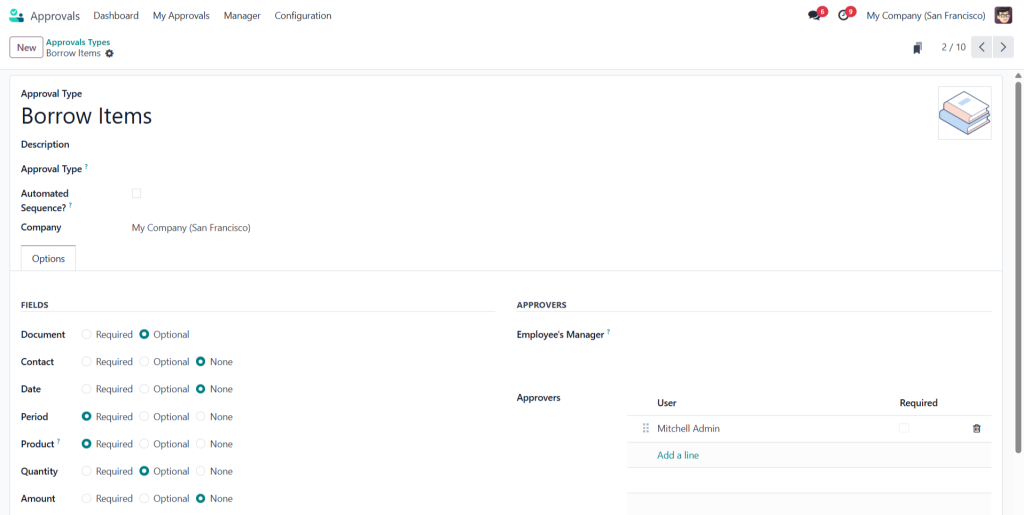
- Go to Configuration ➜ Approval Types
- Select any existing type to edit its configuration
Options you can customize:
- RFQ Creation Option
- Choose if an RFQ (Request for Quotation) should be auto-created after approval.
- Select from the dropdown or leave blank.
- Choose if an RFQ (Request for Quotation) should be auto-created after approval.
- Automated Sequence
- Check the box to enable auto-generated sequence codes
- Define a custom sequence prefix if needed
- Check the box to enable auto-generated sequence codes
- Field Configuration
- Define each field as:
- Optional
- Required
- Not used
- Optional
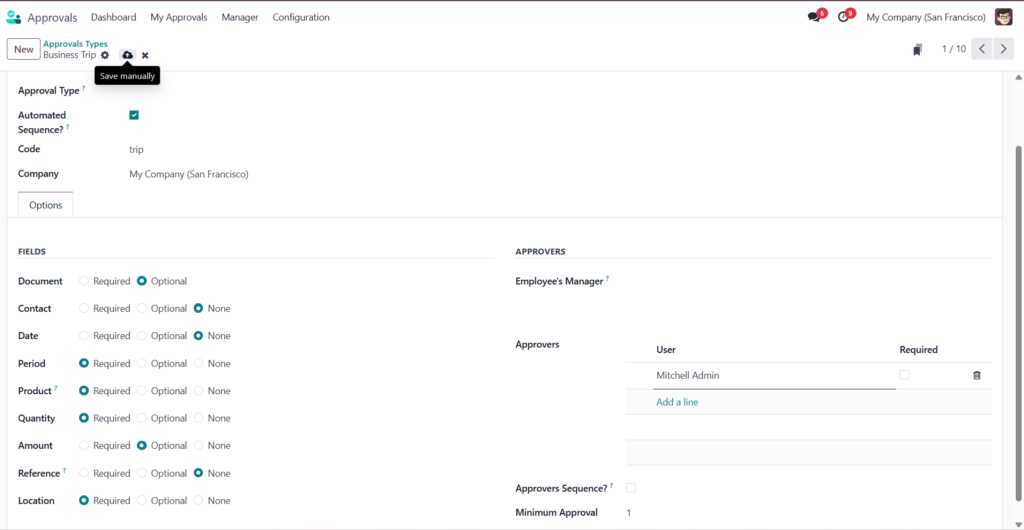
- Example fields:
- Period (required): When the trip will take place
- Allocation (required): Destination
- Amount or Document Upload (optional)
- Period (required): When the trip will take place
- Define each field as:
- Approval Section Setup
- Define whether the manager is:
- Not involved
- An optional approver
- A required approver
- Not involved
- Add multiple approvers
- Define:
- Order of approval (sequence) — strict or flexible
- Minimum number of approvals required
- Order of approval (sequence) — strict or flexible
- Define whether the manager is:
Click “Save” after all configurations are done.
Step 4: Create and Submit an Approval Request
- Log in as an Employee
- Go to the Approvals Module
- Click the appropriate approval type (e.g., Business Trip)
- Fill in all required fields
- Example: “Trip to Toronto from Nov 29 to Dec 1”
- Example: “Trip to Toronto from Nov 29 to Dec 1”
- Click Save, then Submit the request
Status will update to Submitted.
Step 5: Approval by the Manager/Admin
- Log in as the designated Approver (e.g., Manager/Admin)
- Navigate to the Approvals Module
- Click on the Manager button ➜ Go to “Approvals to Review”
- Open the request
- Click Approve
Once approved, the status changes from Submitted to Approved.
Approval Process Completed