How to Build Flutter App Release App Bundle from Android Studio?
Understanding the Importance of a Release App Bundle
Building a release app bundle is paramount in deploying a Flutter app to the Google Play Store. An Android App Bundle (AAB) helps optimise the app’s size and performance by delivering only the necessary resources for each user’s device. In this blog post, we will learn how to build a signed app bundle from Android Studio in Flutter. These steps ensure your app is ready for production with the correct configurations and security measures.Lorem ipsum dolor sit amet, consectetur adipiscing elit. Ut elit tellus, luctus nec ullamcorper mattis, pulvinar dapibus leo.
Prerequisites
Before proceeding, ensure you have completed the following:
Write the code for your app.
Install Flutter and Android Studio on your system.
Configured your Flutter project properly.
Decide on your app name and label text.
If you haven’t finalized the app name or label text, update it in android/app/src/main/AndroidManifest.xml before continuing.
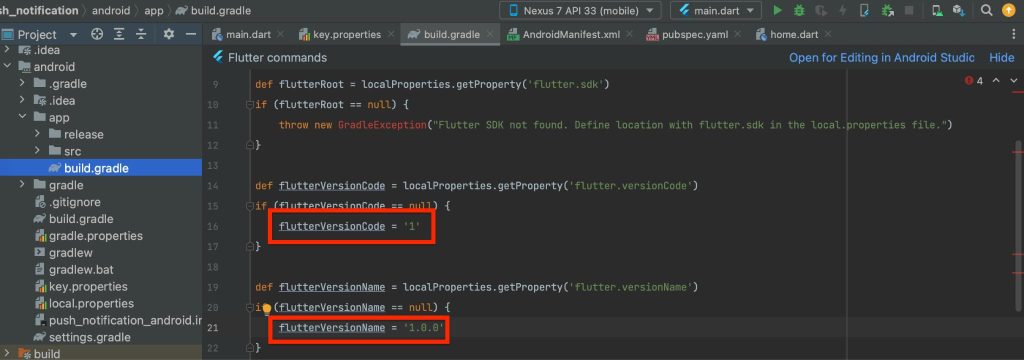
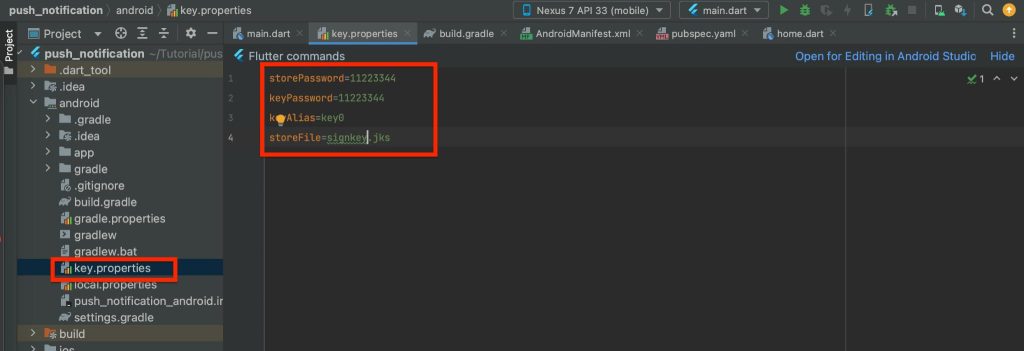
Now, check if the app version name and version code is updated properly from android/app/build.gradle file. These version name and version code need to be updated before each release build. Then, let’s move on to the main task. We will create a file named key.properties inside the android folder and add some required properties. These include storePassword, keyPassword, keyAlias, and storeFile. You can set the names and passwords as per your preference.
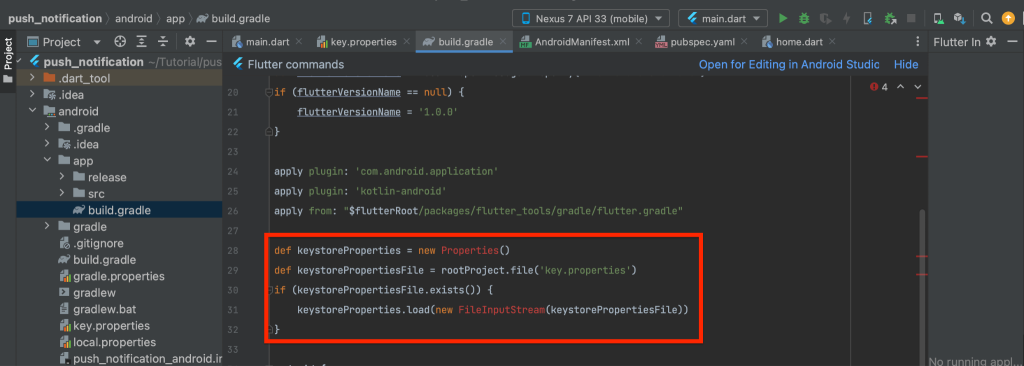
Lastly, we need to change signingConfig.debug to signingConfig.release, as shown in the screenshot.
Next, we need to open the Android module. To do this, click on the ‘Tools‘ menu in Android Studio, then navigate to ‘Flutter‘ and select ‘Open for Editing in Android Studio‘. Refer to the screenshot below for guidance.
Once the Android module opens, it may take time to sync completely. After the sync, click on the ‘Build’ option in Android Studio. Then, select ‘Generate Signed Bundle / APK’ from the menu. Check the screenshot below for reference.
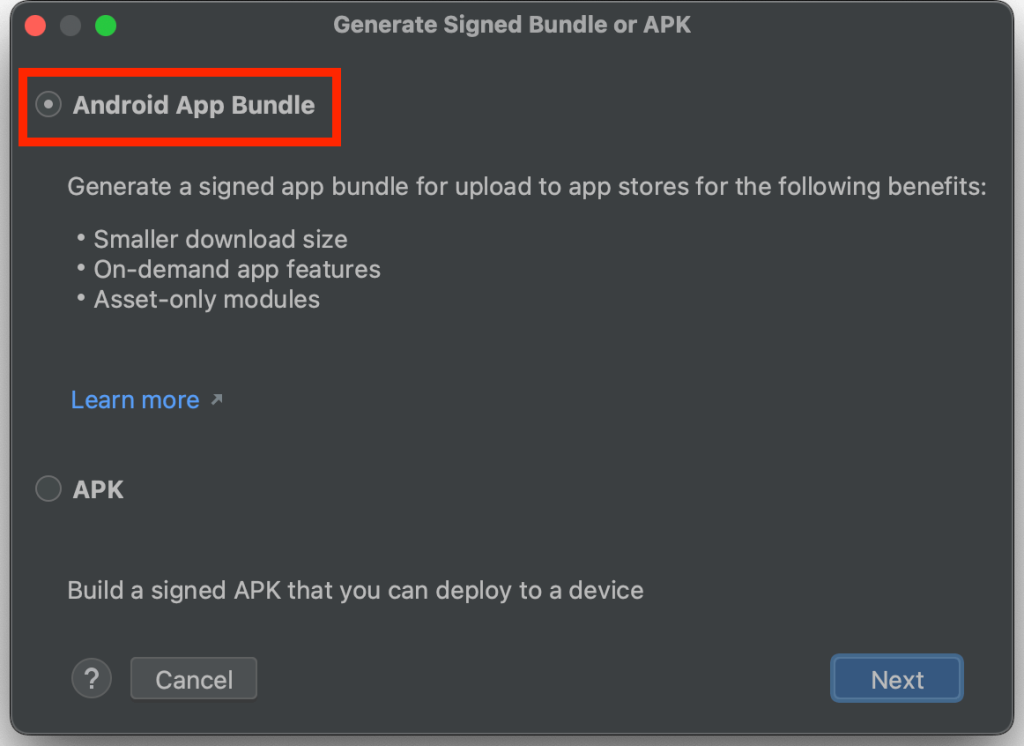
A new window will appear. Select the ‘Android App Bundle’ option and click ‘Next’ to proceed.
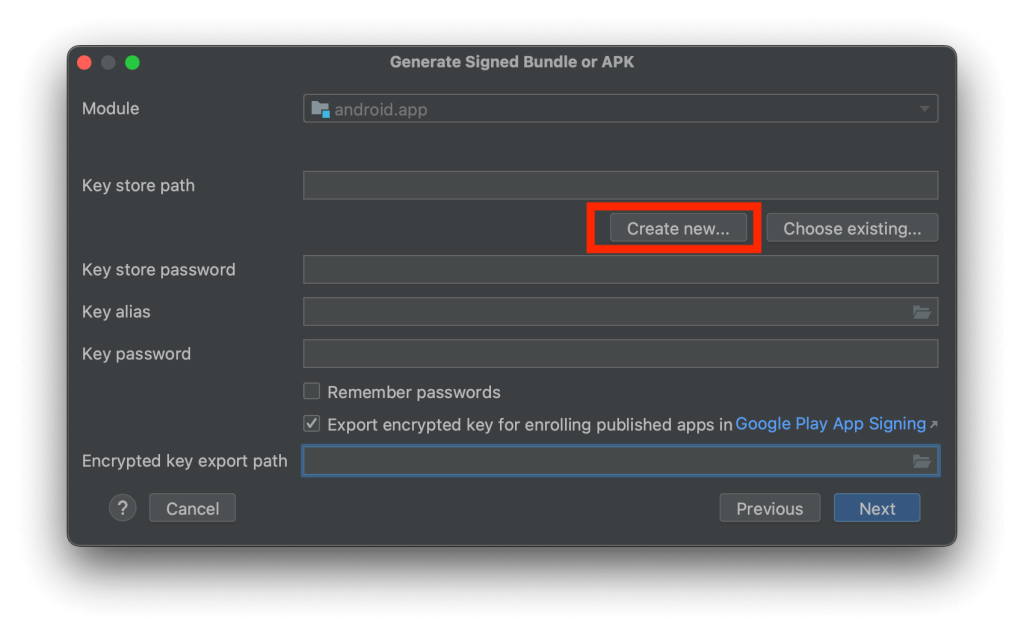
Now, select “Create new”.
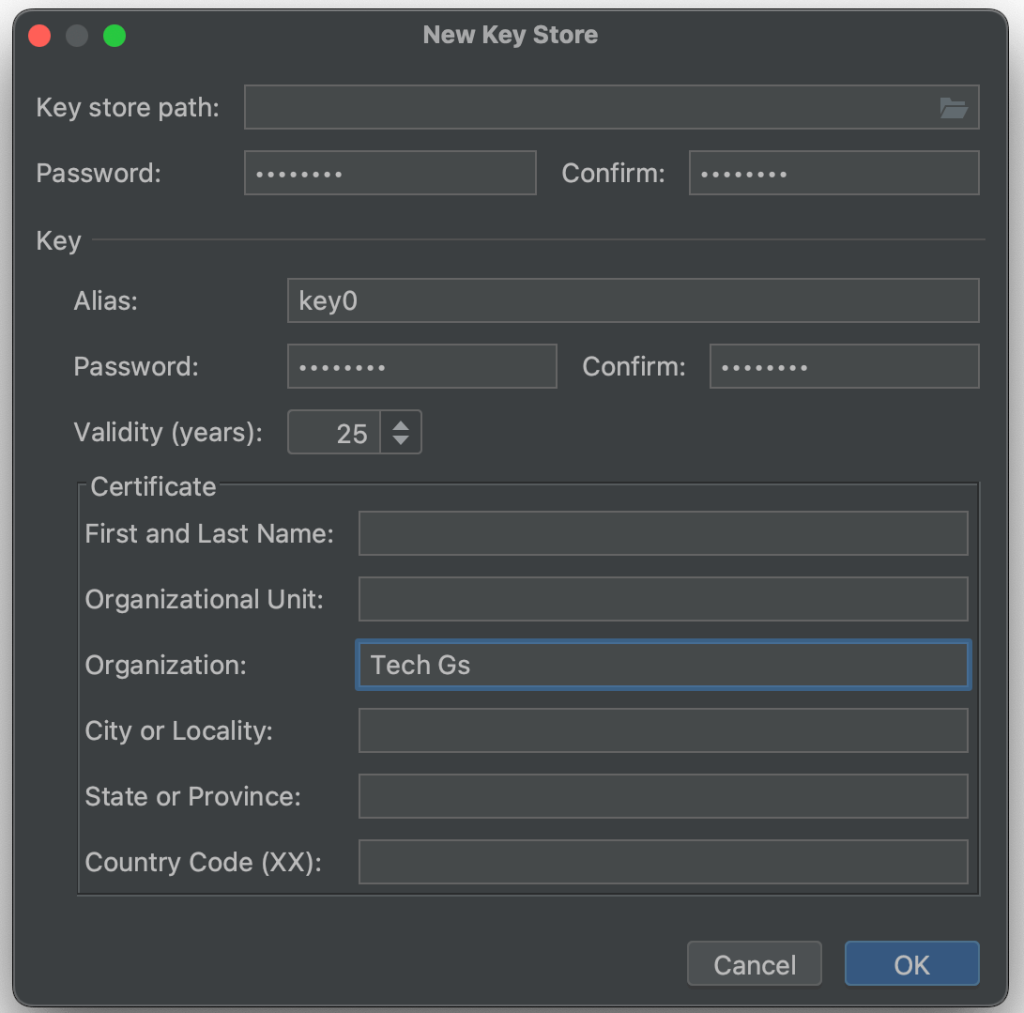
In the next screen, select the file path where the key will be saved, along with the keystore password and key alias. Use the same password and details specified in the “key.properties” file. In the Certificate section, ensure that at least one field is filled, then click “OK” to proceed.
Afterwards, your information will be set, and you can click “Next” on the screen. On the next screen, click “Release” to generate the release file. It may take some time for the app bundle to be generated. Once it’s ready, you’ll be notified, and you can check the location where the app bundle has been saved.
Android Studio will now generate the release app bundle. Once the process is complete, you will receive a notification with the saved location of your .aab file.
Final Thoughts on Building a Signed App Bundle
You have successfully created a signed Android App Bundle for your Flutter app. This bundle is optimised for distribution via the Google Play Store, ensuring better performance and reduced app size. Remember to keep your keystore file safe, as it is required for future updates.
Stay tuned with us at Netilligence for more Flutter development tutorials. Happy coding!
We use cookies to ensure that we give you the best experience on our website. If you continue to use this site we will assume that you are happy with it.