Why Refusal of Applicants in Odoo 18 Recruitment Matters
When we think about recruitment, most of us visualize finding the perfect candidate, scheduling interviews, and sending out job offers. But the truth is, a big part of hiring is telling people they didn’t get the job. This is where Refusal of Applicants in Odoo 18 Recruitment becomes an integral part of your hiring process. It’s not just a tool for saying “no” to candidates; it’s a complete system that makes the process professional, quick, and respectful.
In Odoo 18, the Refusal of Applicants feature in the Recruitment module works like an intelligent assistant for your HR team. It enables you to set clear Odoo recruitment refusal reasons, choose or customize Odoo recruitment email templates, and integrate everything into your Odoo recruitment workflow configuration. This way, the process isn’t just more straightforward, it’s faster and more consistent.
Think about how much time it takes to send refusal emails one by one, or to make sure everyone is given the right reason for rejection. With Odoo recruitment process automation, all of that can happen in seconds. You mark someone as “refused,” pick a reason, and the system does the rest. It even keeps all applicant records in Odoo recruitment applicant management, so you can reach out to them again in the future if a better role comes up.
In this guide, we’ll walk through every step of setting up Odoo 18 recruitment features for applicant management. You’ll see how the Odoo recruitment module tutorial makes it easy to manage refusals, why refusal reasons are so important, and how automation turns a slow manual task into something effortless.
Understanding Refusal of Applicants in Odoo 18 Recruitment
Every company rejects candidates; it’s just a reality of the hiring process. But how you reject them matters. If you do it late, without a reason, or in an unfriendly way, you risk damaging your company’s reputation. The Refusal of Applicants in Odoo 18 Recruitment feature solves this problem by helping you manage rejections professionally and thoughtfully.
With this tool, you can predefine Odoo ERP recruitment refusal reasons that make sense for your hiring process. Instead of sending vague messages like “You’re not selected,” you can tell candidates why they didn’t move forward, like “Lack of relevant experience” or “Position already filled.” When combined with Odoo ERP recruitment email templates, these reasons become part of a consistent and polite message sent to the candidate automatically.
This is where Odoo ERP recruitment workflow configuration shines. Instead of manually moving an applicant to a “refused” stage, you can integrate this process into your workflow. This way, once an applicant reaches that stage, the correct email is sent, the record is updated, and the refusal is logged, all without extra work from your HR team.
How to Set Up Odoo 18 Recruitment Refuse Applicant Feature
The first step in learning Odoo 18 ERP recruitment refuse applicant setup is knowing where to find it. Everything happens inside the Recruitment module. Once you’re there, you can open the list of applications and choose any applicant you want to refuse. But before you do that, you need to set up your refusal system.
To begin configuring the Odoo 18 recruitment refuse applicant feature, follow these steps:
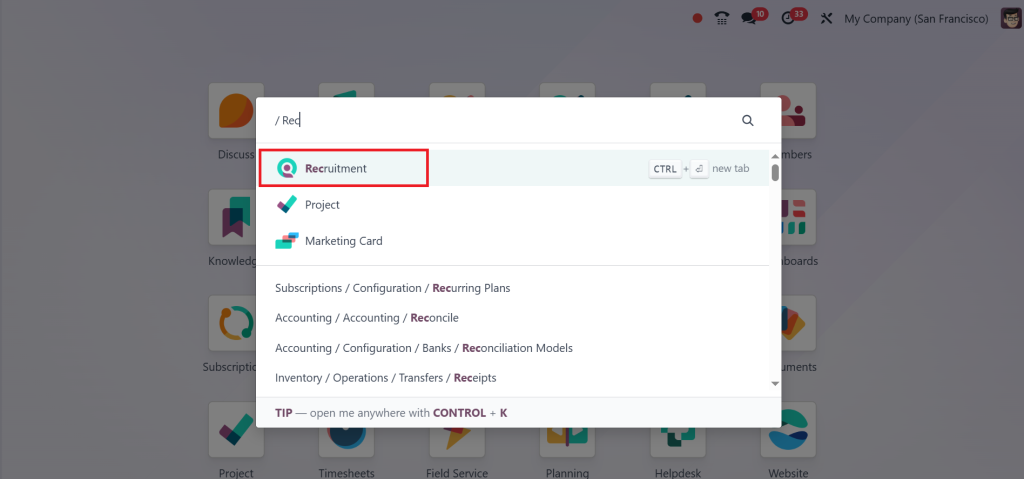
Direct to the Recruitment module.
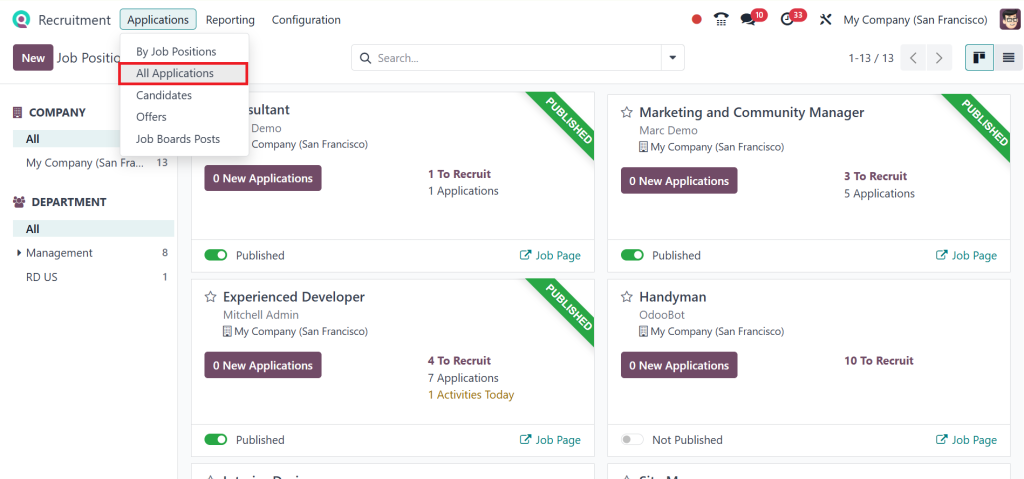
Go to the Applications menu and click on All Applications to see the list of applicants.
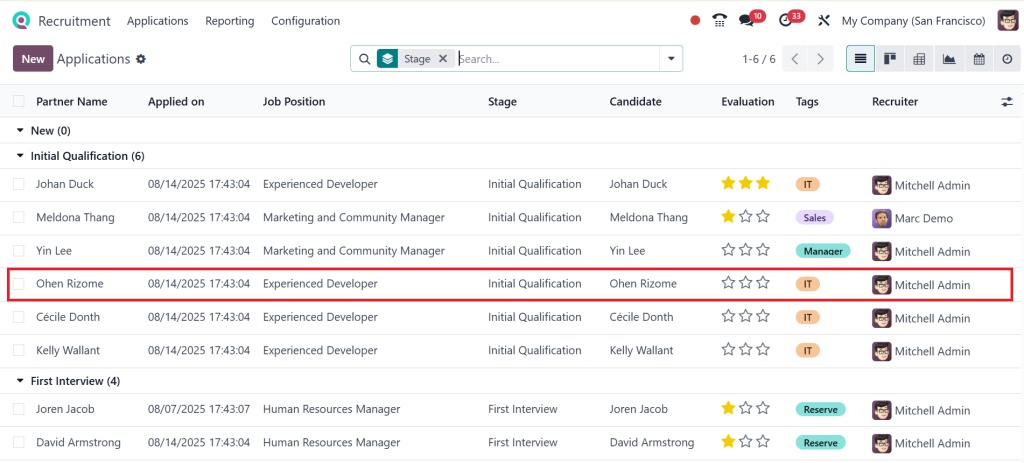
Here, you have a lot of applications which are in the initial qualification stage. Click on any one from the list.
Click on the Refuse button.
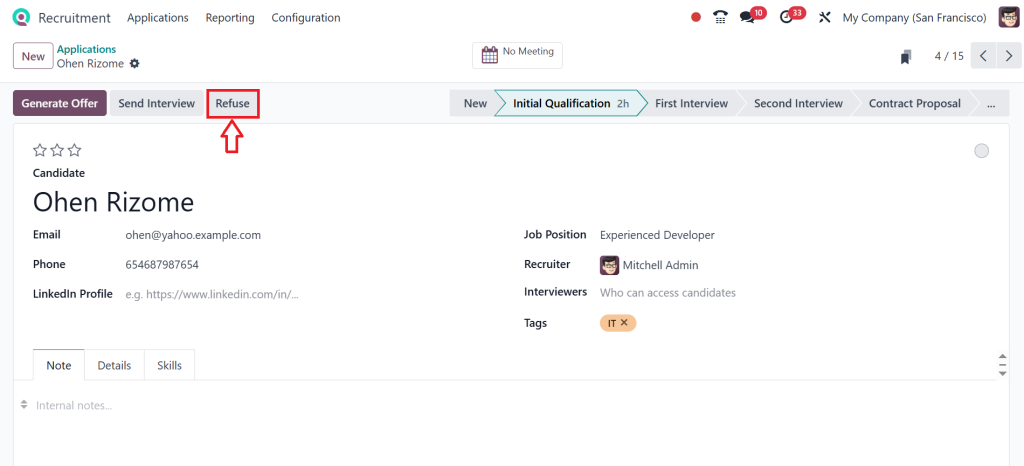
Now, in the screenshot below, you can see a wizard with a lot of reasons for refusal.
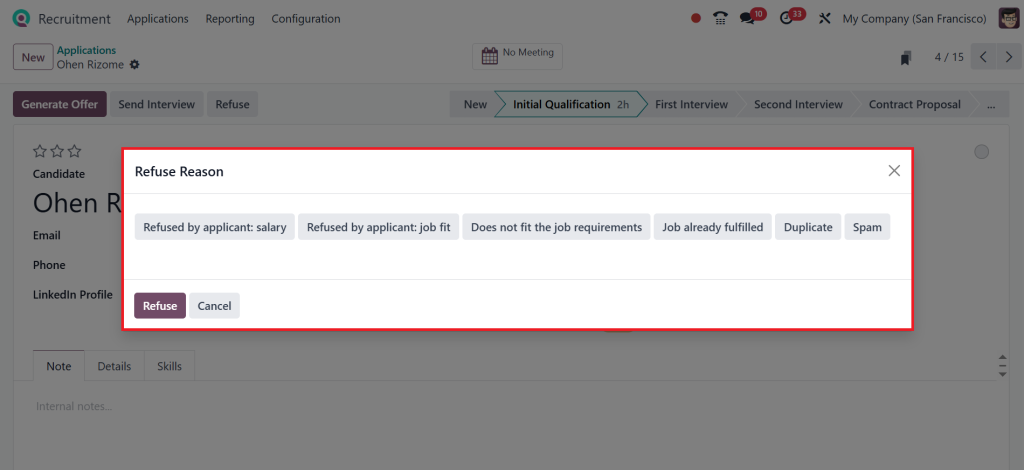
Select the reason from here and then click on Refuse. After choosing the reason, the system will automatically select the corresponding email template.
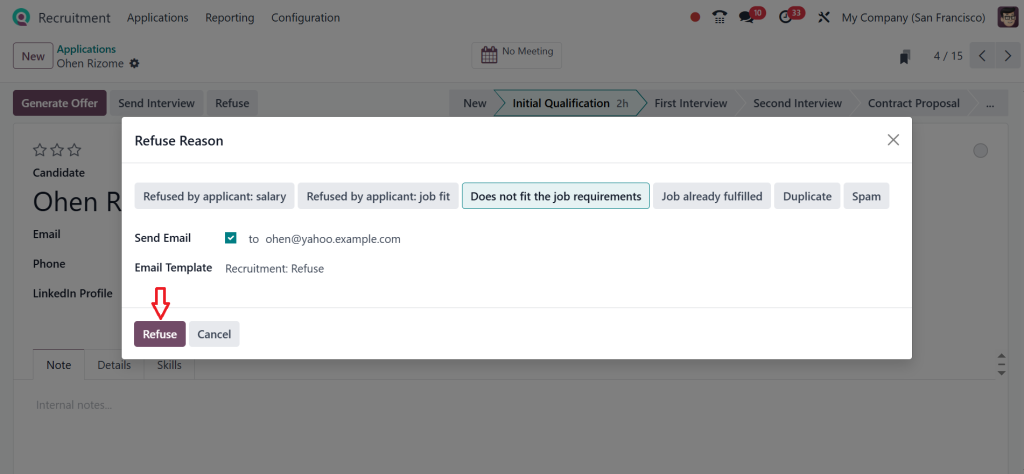
After clicking on “Refuse,” the email will be sent and the applicant marked as “Refused.”
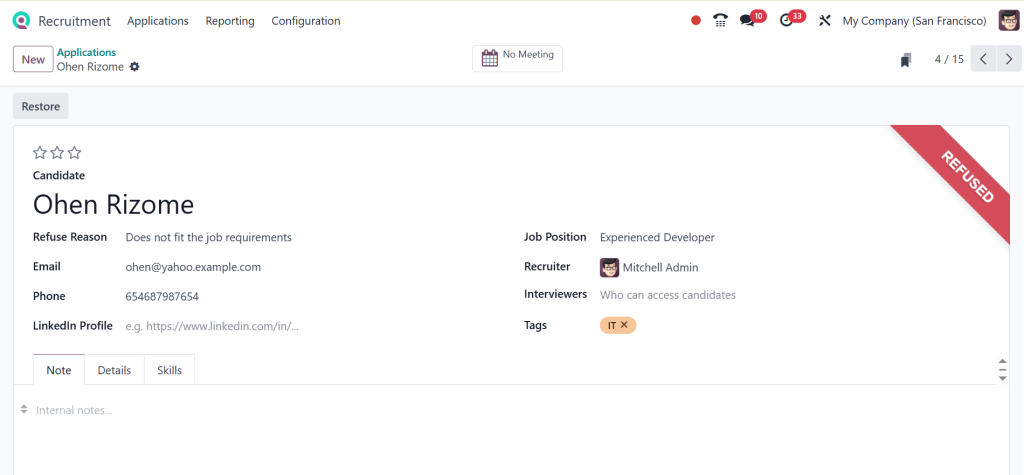
This is how easily you can use the “Refusal of Applicants” feature in the Odoo 18 Recruitment module.
How to Create Refusal Reasons in Odoo 18 Recruitment?
Odoo recruitment refusal reasons help HR teams document why an applicant was not selected. To configure:
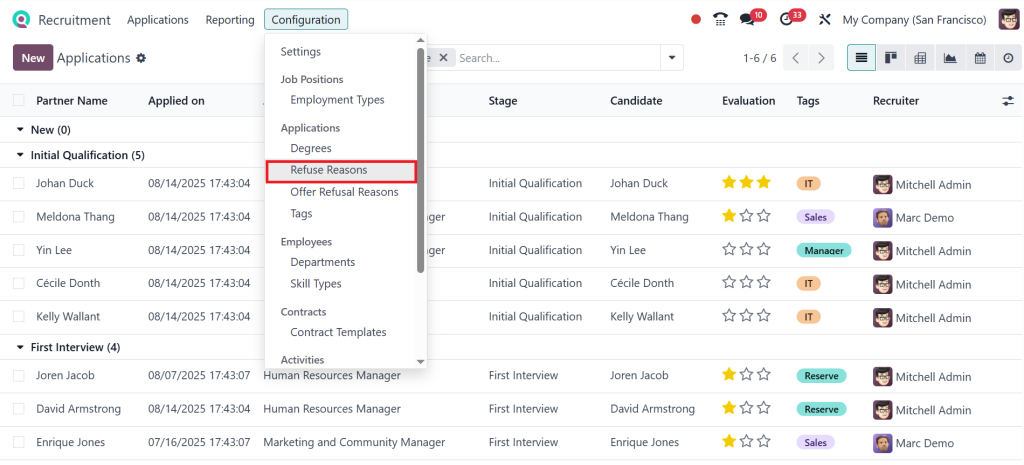
In the Recruitment module, go to Configuration → Refuse Reasons.
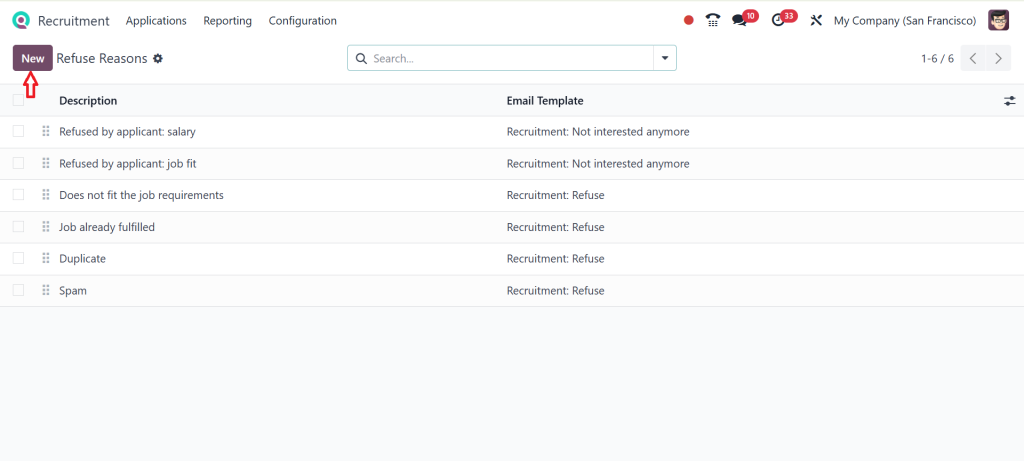
Click ‘‘New’’ to add a new refusal reason.
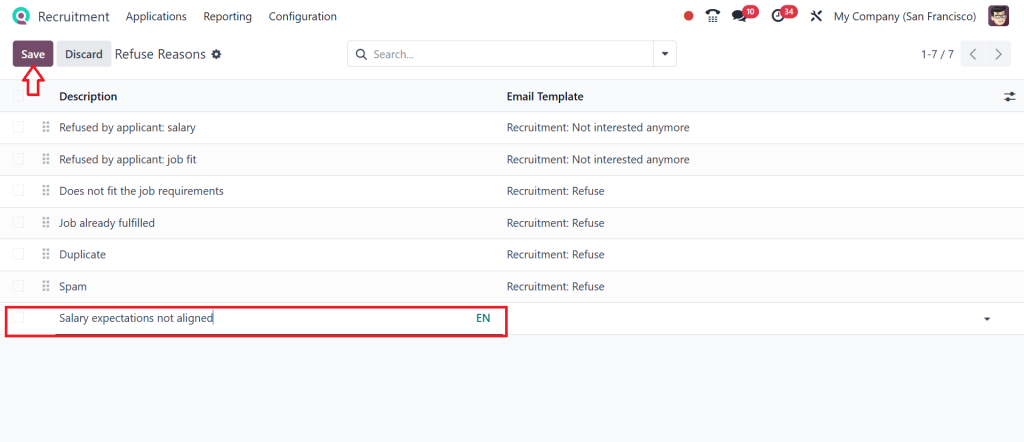
Add the refusal reason and click on Save. Examples of refusal reasons might include:
- Lack of relevant experience
- Skills mismatch
- Salary expectations not aligned
- Position already filled
By defining Odoo ERP recruitment refusal reasons, you keep track of applicant trends and maintain transparency in your hiring process.
Using Odoo Recruitment Workflow Configuration for Refusals
Here’s where things get exciting, connecting refusals to your Odoo recruitment workflow configuration. In Odoo, the recruitment process is visual, with stages like “New,” “Shortlisted,” “Interview,” and “Hired.” You can add a “Refused” stage to this pipeline.
Now, instead of manually emailing rejected applicants, you move them to the “Refused” stage.
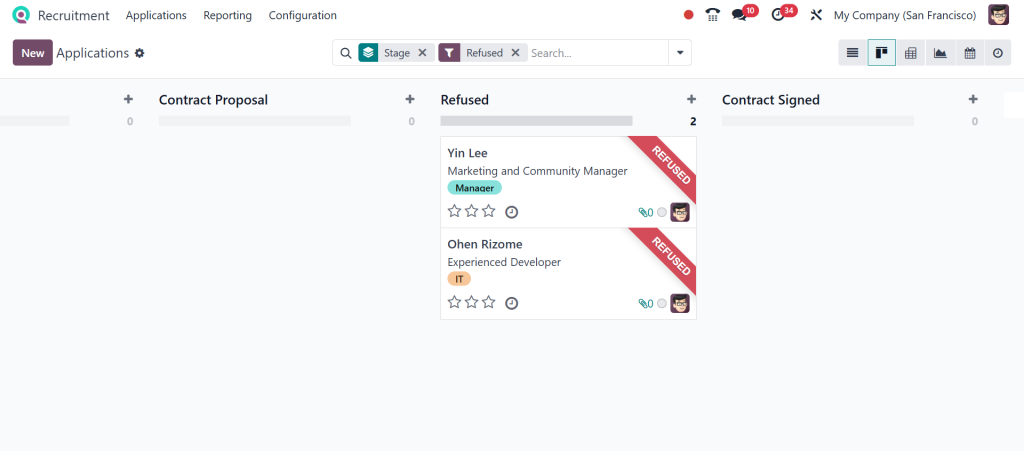
Instantly, the Odoo recruitment process automation kicks in:
- The refusal reason is logged.
- The matching Odoo recruitment email template is sent.
- The applicant record is updated in Odoo recruitment applicant management.
This is how you turn a task that could take hours into something that takes seconds.
Why Odoo Recruitment Refusal Reasons Are So Assertive
Many companies overlook this aspect, but Odoo’s recruitment refusal reasons are a treasure trove of valuable information. Imagine having a report that tells you why candidates are most often rejected. Your salary ranges may be too low, or you’re attracting candidates from the wrong industry. With Odoo’s reporting, you can see patterns and adjust your hiring strategy.
Also, refusal reasons aren’t just for internal use. They help you send more personalized messages. For example, if someone was rejected because the “Position was already filled,” you can send a refusal email that says:
“We were impressed by your profile, but unfortunately, the position has already been filled. We would love to keep your details on file for future opportunities.”
This kind of communication keeps the door open for future roles and makes applicants feel valued.
Customizing Odoo Recruitment Email Templates for Refusal
The Odoo ERP recruitment email templates are where you can make your company’s personality shine. While the system comes with a default refusal email, it’s worth taking time to make it your own.
Here’s what a good template includes:
- A friendly greeting.
- A short thank-you for applying.
- The refusal reason (if appropriate).
- Encouragement for future applications.
For example:
”Dear [Applicant Name],
Thank you for applying to [Company Name]. After examining your application, we have decided to move forward with other candidates. We genuinely respect your interest and encourage you to apply for future opportunities with us.
Best regards,
[Your Name]”
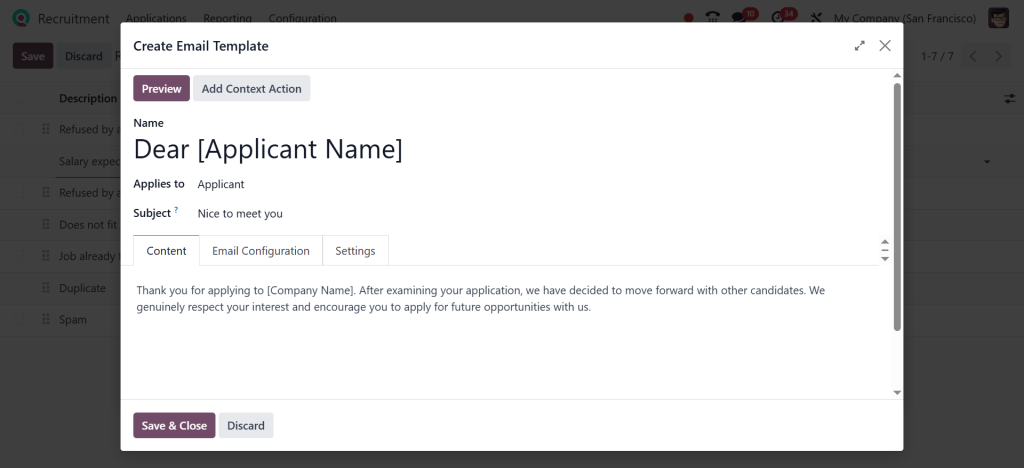
With Odoo ERP recruitment workflow configuration, you can attach this template directly to the “Refused” stage so it’s sent automatically.
Odoo Recruitment Applicant Management After Refusal
Refusing an applicant doesn’t mean deleting their profile. With Odoo recruitment applicant management, all applicant records stay in your system. This is extremely useful when a new position opens up. You can search your database for previously rejected candidates who might be perfect for the new role.
This is one of the most significant advantages of using the Odoo recruitment module tutorial approach: you don’t just end the relationship after a refusal. Instead, you turn it into an opportunity to build a long-term talent pool.
Odoo Recruitment Process Automation for Faster Refusals
One of the most impressive aspects of Odoo 18 is its effective handling of the Odoo recruitment process automation. Imagine you have 50 candidates who didn’t make it past the initial screening. Without automation, you’d have to email each one, update their status, and record the refusal reason manually. That could take hours.
With automation, you move them to “Refused,” and everything else happens instantly. This not only saves time but also ensures every applicant gets a timely and professional response.
The Odoo Recruitment Module Tutorial for Refusal Setup
If you follow the Odoo recruitment module tutorial for setting up refusals, you’ll notice how simple the process is:
- Define Odoo ERP recruitment refusal reasons.
- Create Odoo ERP recruitment email templates.
- Add a “Refused” stage in the Odoo ERP recruitment workflow configuration.
- Link templates to refusal reasons.
- Activate Odoo recruitment process automation.
Once done, your recruitment team will have a system that handles refusals with almost no manual work.
Why Refusal of Applicants in Odoo 18 ERP Recruitment Improves Your Hiring Process
When you configure Refusal of Applicants in Odoo 18 ERP Recruitment, you’re not just rejecting candidates, you’re building a better recruitment experience. Candidates get fast, polite communication, your HR team saves time, and your hiring data becomes more valuable.
Using Odoo 18 ERP recruitment refuse applicant tools alongside Odoo recruitment applicant management means you can handle rejection without damaging relationships. Many companies have re-hired applicants they initially refused, simply because they kept communication open and professional.
Closing the Loop with Refusal of Applicants in Odoo 18 ERP Recruitment
The Refusal of Applicants in Odoo 18 ERP Recruitment feature is one of those tools that seems small but has a huge impact. By combining Odoo ERP recruitment refusal reasons, Odoo ERP recruitment email templates, Odoo ERP recruitment workflow configuration, and Odoo recruitment process automation, you create a hiring process that’s efficient, consistent, and respectful.
It’s not just about saying “no”, it’s about how you say it, how fast you say it, and what you do with that information afterwards. With the proper setup, Odoo 18 ERP recruitment refuse applicant functionality can become a strength of your HR strategy, not just an administrative step.
Get in touch with our Odoo experts at Netilligence today and let us help you update your applicant management with intelligent automation and professional workflows.