The sales and stock movements in Odoo v18 operate as a single integrated system. Odoo automatically controls outgoing stock when sales occur and handles incoming stock through purchase orders and other inventory management processes. The real-time synchronization system prevents manual errors while maintaining precise inventory levels. This guide demonstrates the process of making sales and delivering products while showing you how to monitor both incoming and outgoing stock movements to maintain operational efficiency between sales and inventory management.
Step 1: Create a Sales Order
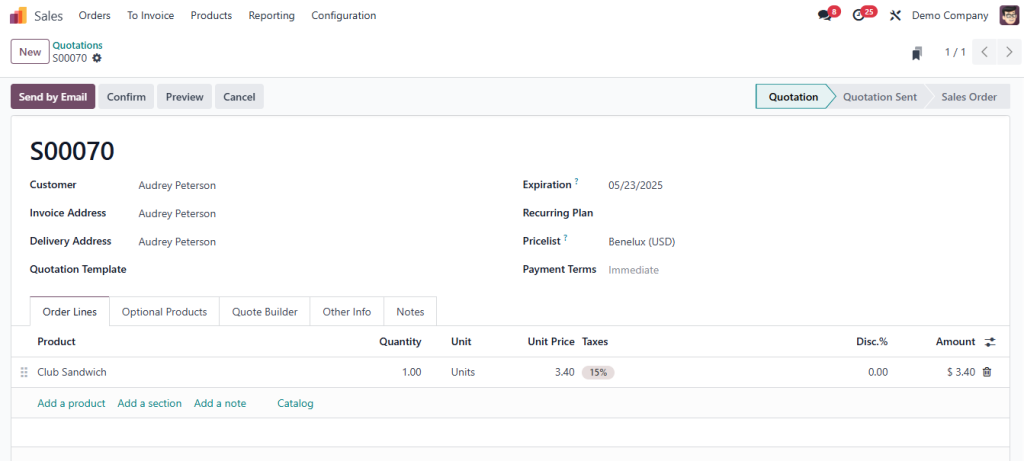
To start, you need to create a Sales Order for the product(s) being sold.
- Go to: Sales → Orders → Quotations
- Click Create to start a new sales order.
- Select the Customer who is making the purchase.
- Add the Products the customer is purchasing:
- Choose the product from the list and enter the quantity.
- Odoo will automatically pull the price and any discounts if applicable.
- Choose the product from the list and enter the quantity.
- Once all products are added, click Confirm Sale to convert the quotation into a confirmed sales order.
This will automatically generate the Stock Move for the outgoing products, moving them from your inventory to the customer.
Step 2: Deliver the Products (Outgoing Stock)
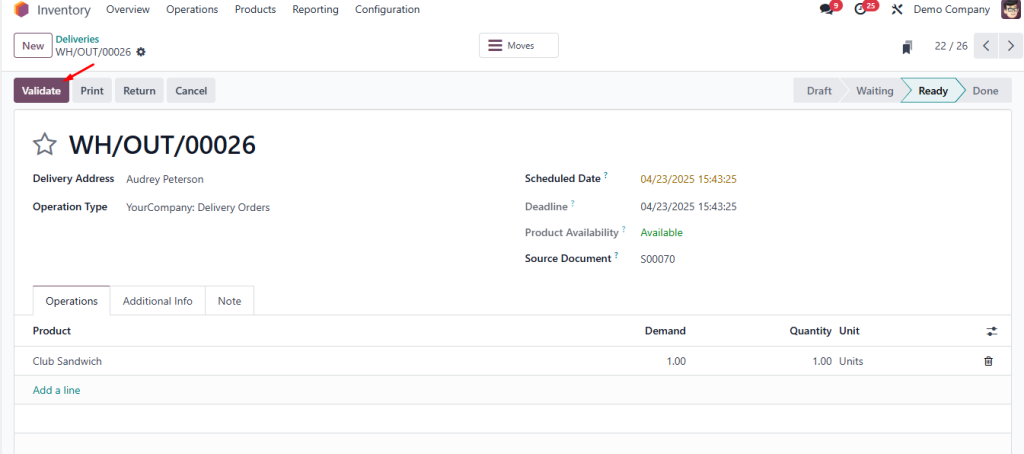
Once the sales order is confirmed, you’ll need to process the delivery of the products.
- After confirming the sales order, go to the Sales Order screen.
- Click on Deliver to begin the delivery process.
- You’ll be directed to the Inventory → Operations → Transfers section, where the system has already generated the stock move.
- In the stock move, you’ll see the Source Location (your warehouse) and the Destination Location (the customer’s address or another location).
5. Validate the transfer to confirm the products are being delivered, which will automatically update the stock levels.
Step 3: Check Outgoing Stock Movements
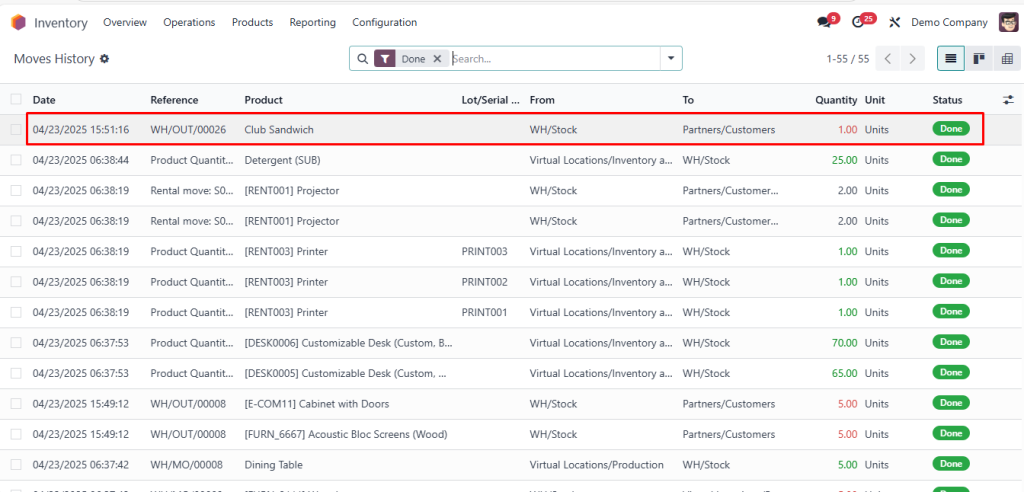
After delivering the products, it’s important to track the outgoing stock movements.
- Go to: Inventory → Reporting → Products Moves
- You’ll see all the product movements, including outgoing deliveries, with details such as:
- Product name
- Quantity moved
- Source and Destination locations
- Date and time of movement
- Product name
You can filter these movements by date, product, or location to get a detailed view of your outgoing stock.
Step 4: Check Incoming Stock Movements
If you need to check the incoming stock movements, you can do so through purchase orders or inventory adjustments.
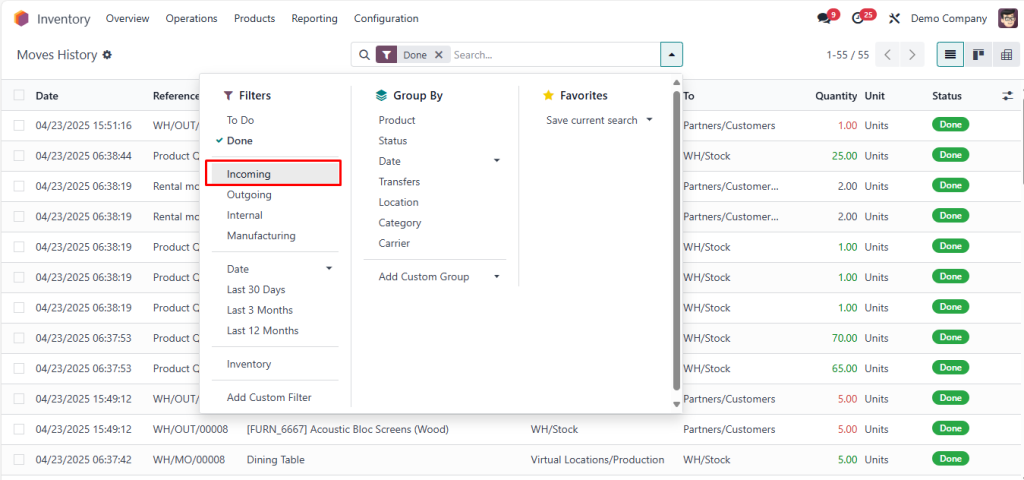
- Go to: Inventory → Reporting → Products Moves
- Filter the report by the incoming stock to view products that have been received, such as from suppliers.
You’ll see:
- Product names
- Quantity received
- Source locations (e.g., supplier warehouses)
- Date of receipt
This will help you track how much stock has been replenished and where it came from.
Step 5: Check Stock Levels After Sales
To see how your sales have affected stock levels, you can check the current stock levels.
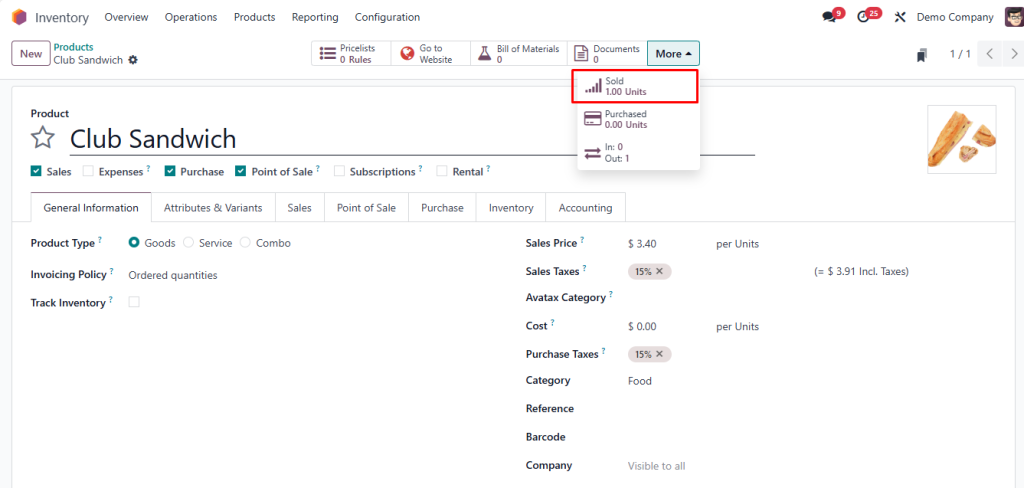
- Go to: Inventory → Products
- Find your product and check the current stock listed in the Inventory column.
You’ll also see the Stocked Quantity for each product, which is updated automatically when sales or purchases are processed.
Seamless Sales and Inventory Management with Odoo v18
Odoo v18 provides an efficient system to handle sales operations and monitor stock movements between incoming and outgoing stock. Odoo will automatically manage stock movements after you confirm a sales order. Odoo provides tools to monitor stock levels and track movements which help maintain current inventory information.
By following this guide, you’ll be able to:
> Create and confirm sales orders.
> Deliver products to customers and manage outgoing stock.
> Check the incoming and outgoing stock movements.
> Monitor your stock levels.
This will help you stay on top of your inventory and make informed decisions based on real-time data.