How to Create Work Centers in Odoo 18 Manufacturing?
Making Manufacturing Easier with Odoo 18 Work Centers
Let’s face it: manufacturing is no easy task. It comes with its challenges, keeping track of machines, workers, time, and resources, all while ensuring everything stays on schedule. The last thing you want is a production bottleneck because a single task isn’t handled efficiently.
That’s where Odoo 18 work centers come into play. If you’re using Odoo 18 manufacturing, setting up work centers isn’t just a technical task; it’s a game changer for your entire production process. Think of work centers as the “heart” of your operation. They help divide the work, allocate resources, and ensure that everything moves along the production line at the right time.
In this guide, I’ll show you how to create work centers in Odoo 18, configure them, and get the most out of your Odoo manufacturing setup. Trust me, once you’ve set this up correctly, you’ll feel the difference in your workflow. Let’s go right in!
Why Odoo 18 Manufacturing Setup for Work Centers Are Crucial
Let me start by saying this: Odoo 18 work centers are not just another feature; they are the backbone of an efficient production process. Here’s why they matter:
Everything Gets Organized
One of the most challenging parts of manufacturing is juggling multiple tasks at once. When running an assembly line, handling raw materials, or managing a QC (quality control) station, things can get chaotic. With Odoo 18 Manufacturing work centers, you can easily organize your entire workflow. Each task or operation gets assigned to a specific work center. This way, you know exactly who’s doing what and when.
Track Time Like a Pro
How long does a task take on the shop floor? You need that data to adjust schedules, allocate resources, and improve efficiency. With Odoo work centers, time tracking is built right into your workflow. Each work center records how long tasks take, helping you identify which areas might slow your production.
Maximize Resource Use
You’ve probably experienced the frustration of having too many workers standing around because one work center is overloaded, or on the flip side, a work center with too few resources. Creating work centers in Odoo 18 gives you a clear view of where your resources are most needed. That allows you to allocate machines, tools, and workers where they’re most effective and no longer under-utilize your assets.
Better Reporting for Smarter Decisions
Getting caught up in the day-to-day operations is easy, but you need data to make smart, strategic decisions. Odoo App production work centers provide powerful reporting tools that give you insights into productivity, task completion rates, and bottlenecks. With these reports, you can make quick adjustments and keep your production flowing smoothly.
A Step-by-Step Guide: How Odoo Create Work Center
Setting up new systems can be overwhelming, but it’s a breeze once you get the hang of it. Let’s break down how to create work centers in Odoo 18.
Step 1: Go to Odoo Manufacturing Configuration
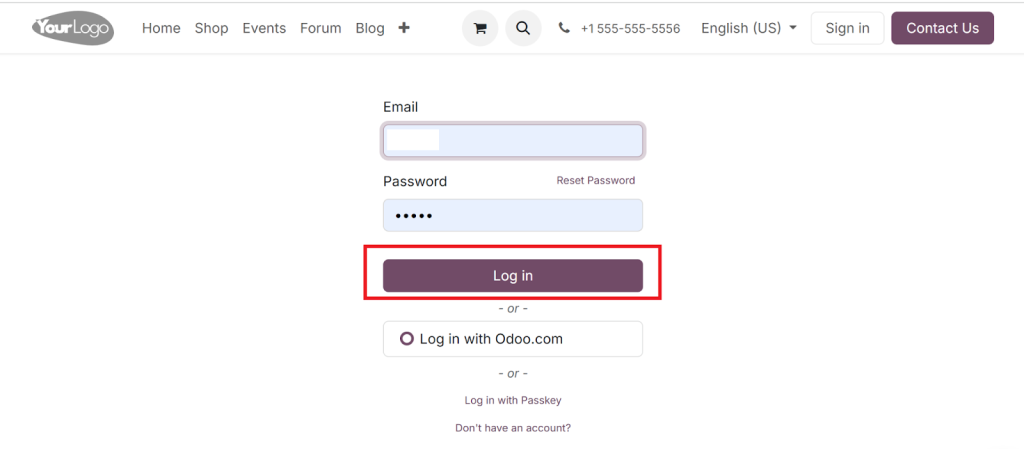
First, log into your Odoo 18 account
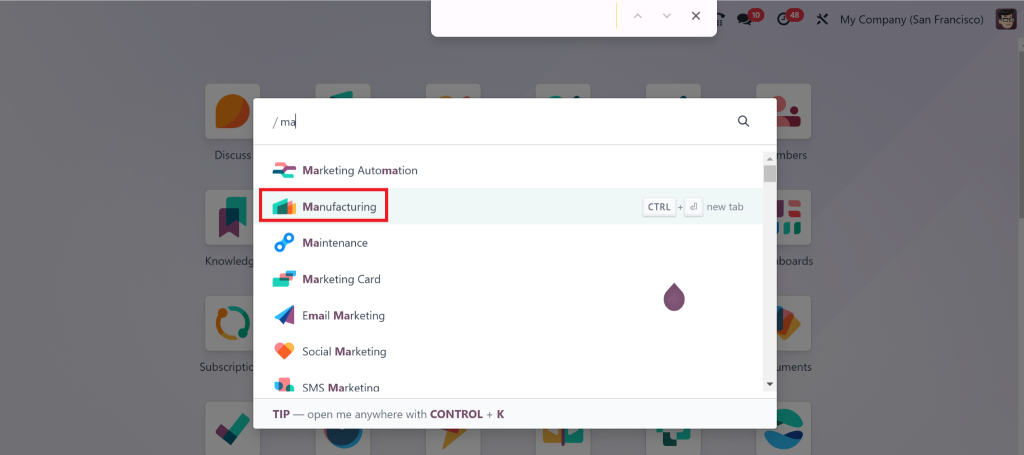
And Go to the Manufacturing module.
You’ll set up all your core manufacturing configurations here, including work centers.
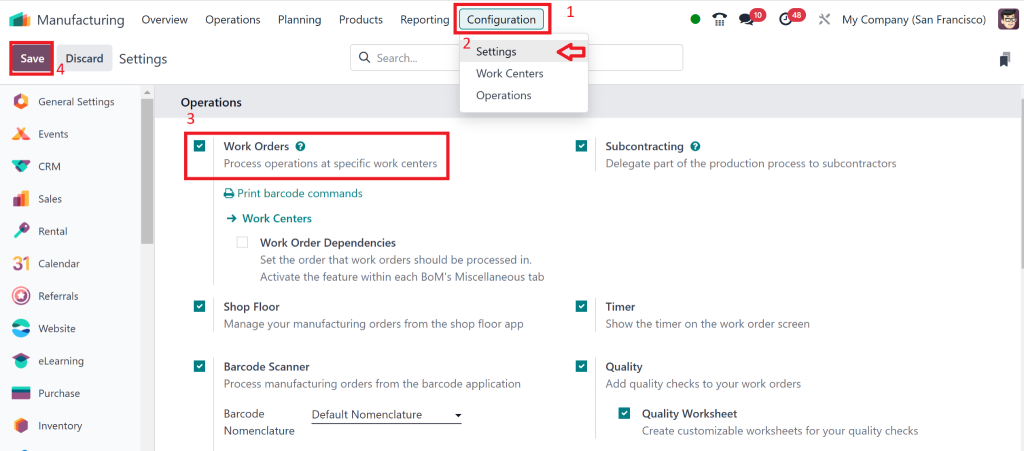
First, make sure that the “work center” is enabled under the settings
For this first go to the Configuration > settings
Step 2: Create a New Work Center
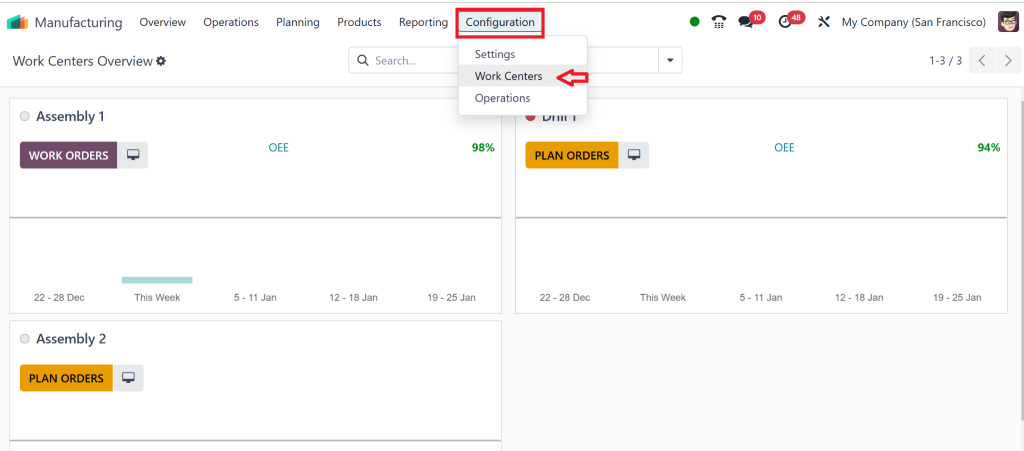
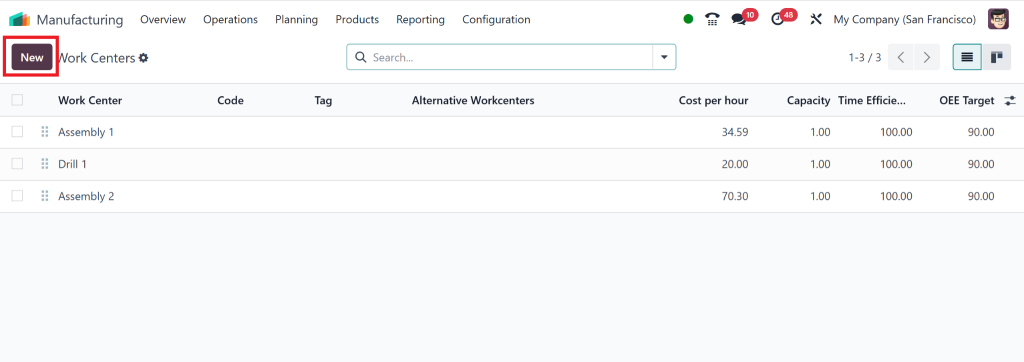
From the main dashboard, find the Configuration tab. Under this tab, you’ll see Work Centers. That is where you can add and manage all your work centers.
Now it’s time to set up your first work center. It’s straightforward:
Click NEW to get started.
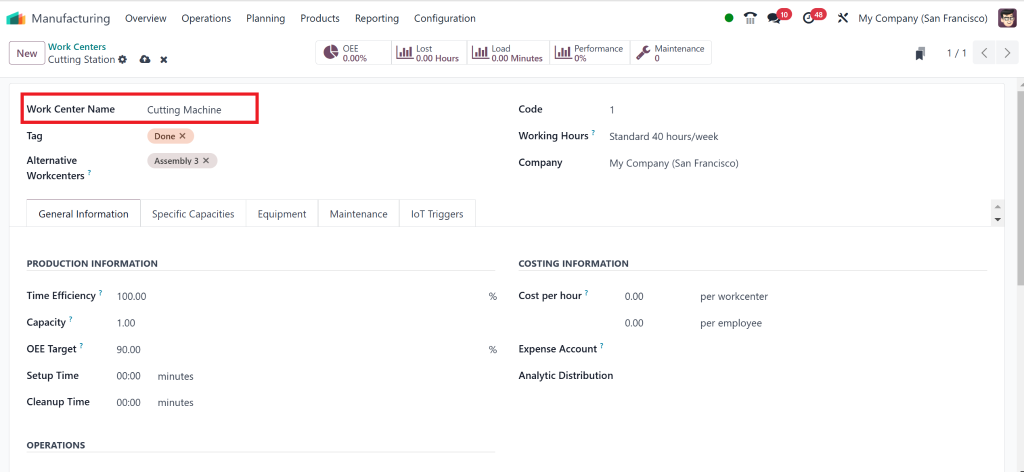
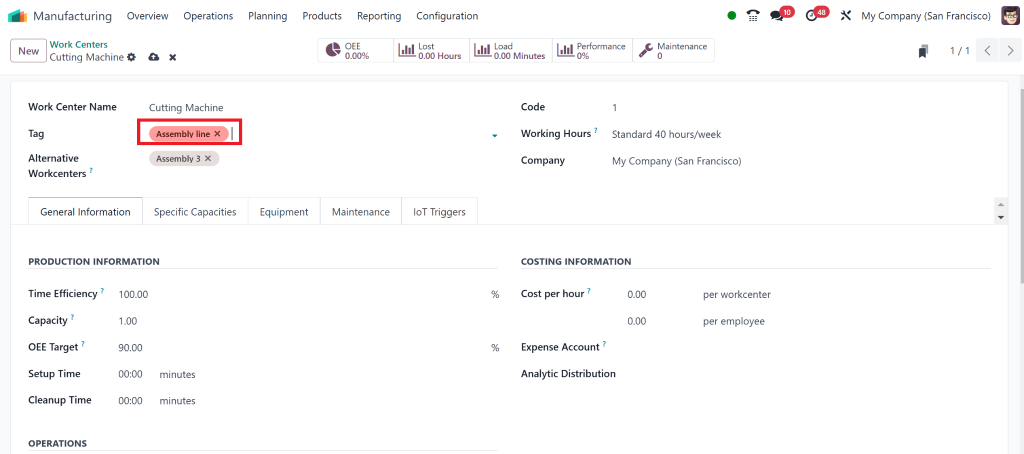
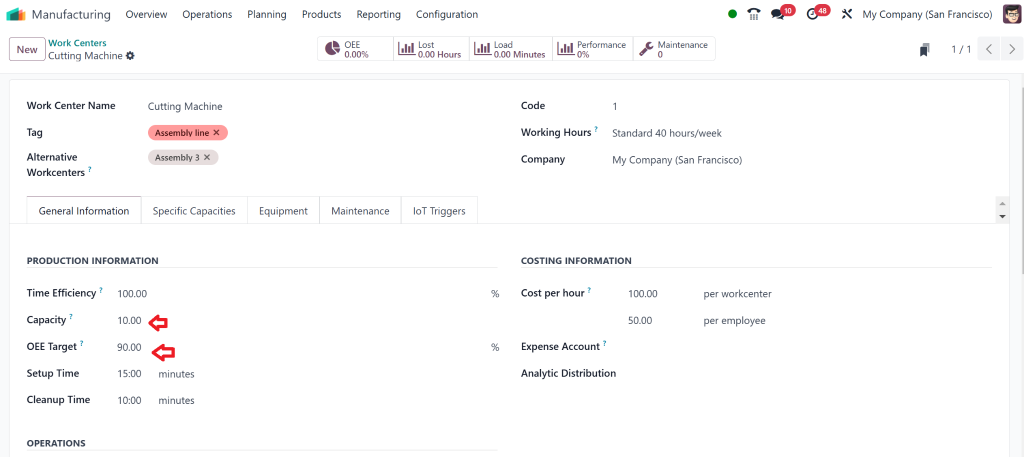
You’ll need to fill in the following details:
Work Center Name: This could be simple, like “Assembly Line 1” or “Cutting Machine.”
Work Center Type: Is this a machine, an assembly line, or a specific station (like testing)? Choose the appropriate type.
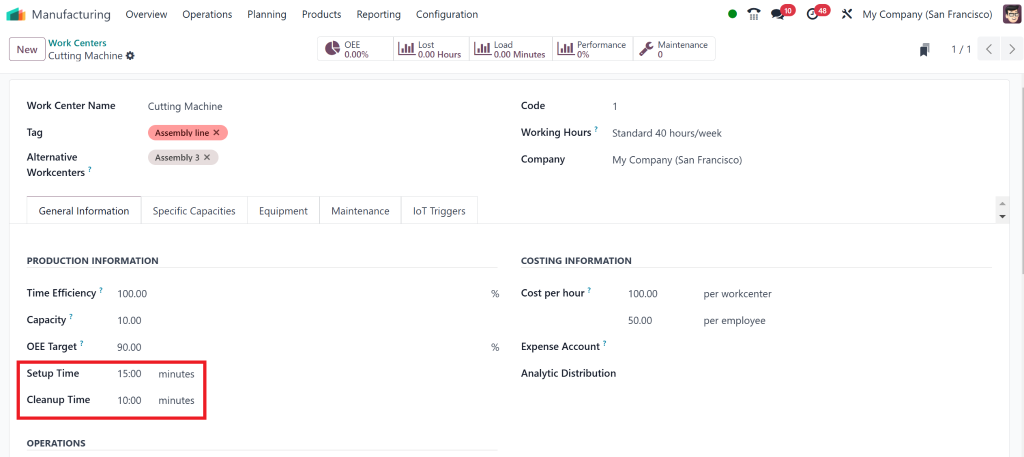
Capacity: How many tasks can this work center handle? Is it a single machine or a team of workers?
Lead Time: This is how long tasks typically take to complete at this work center. If you don’t know yet, you can constantly adjust later.
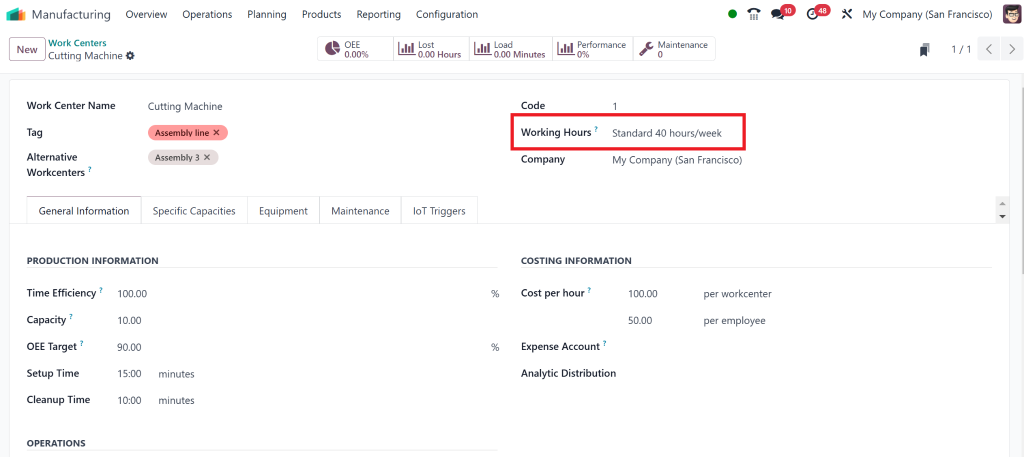
Working Hours: Set the working hours for the process.
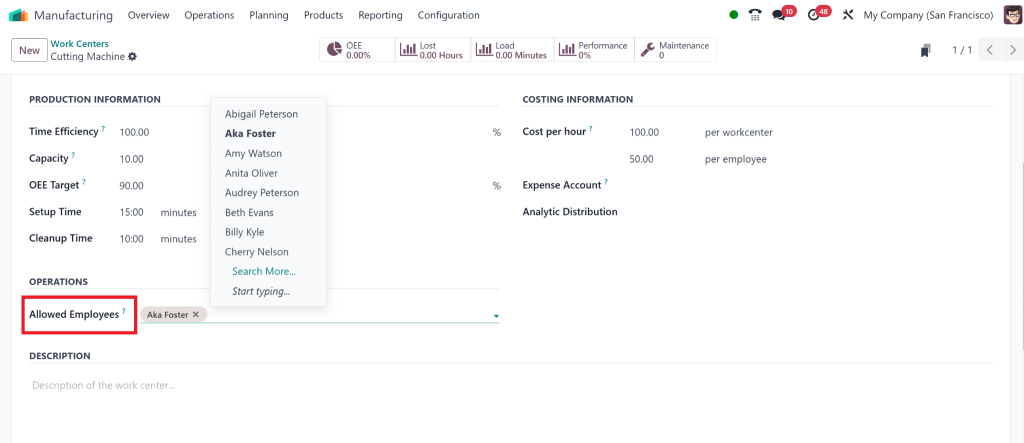
Allowed Employees: we can select which employees are assigned or allowed to do this work.
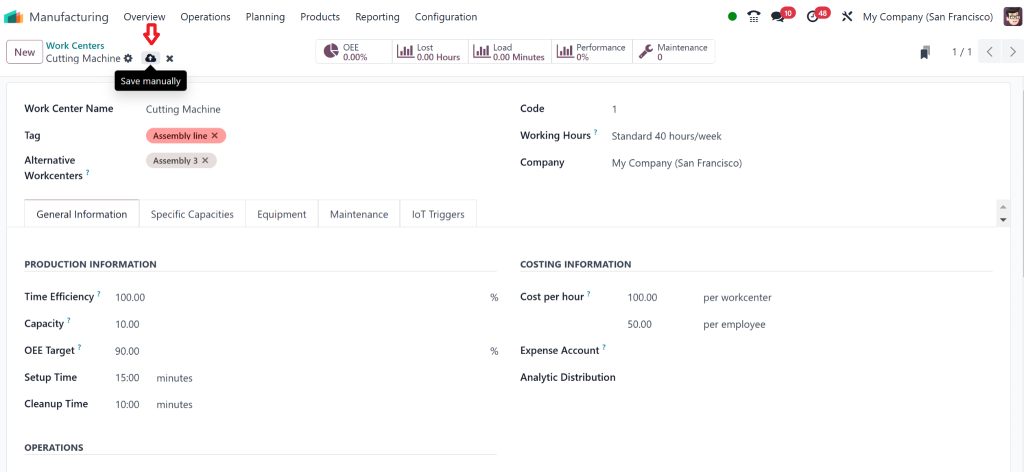
Once you’ve entered the information, hit Save. Your work center is officially created!
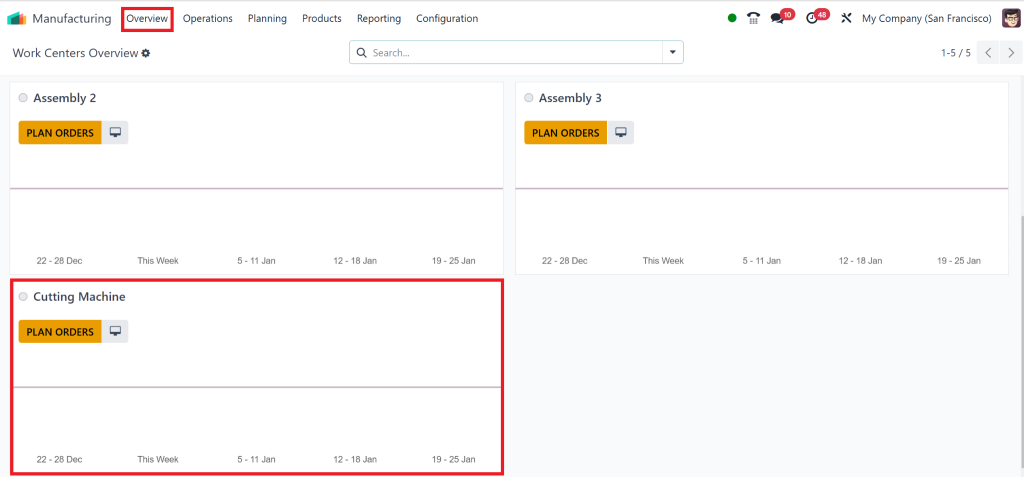
Check the overview
Step 3: Assign Your Work Center to a Work Order
Next, let’s assign the work center to a work order. A work order is a task that needs to be completed. When you create a new work order or edit an existing one, you’ll be prompted to assign it to a specific work center.
Here’s how:
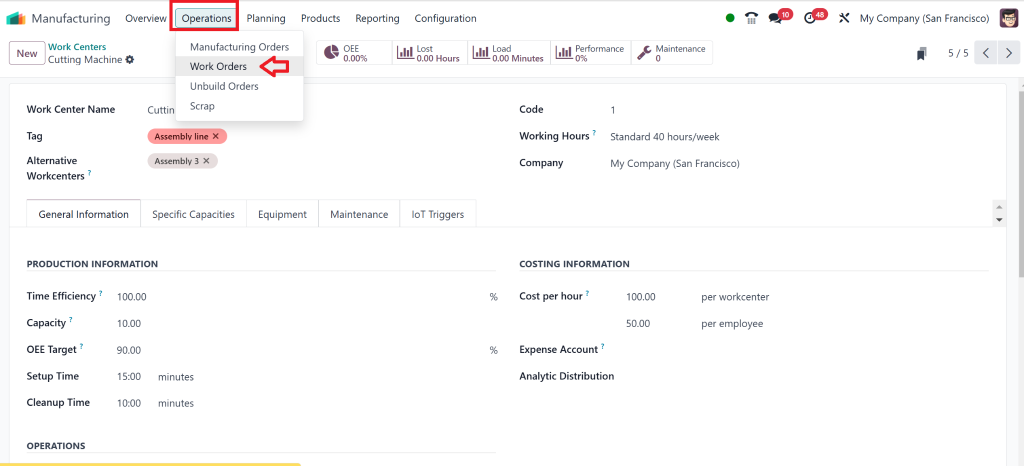
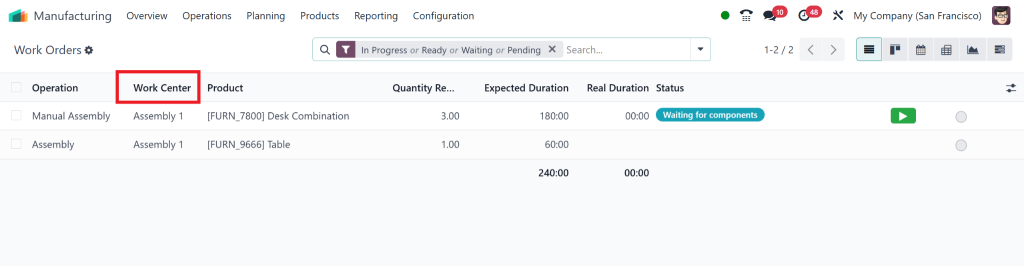
Go to the Work Orders section within the Manufacturing tab.
Either create a new work order or select one that is already in progress.
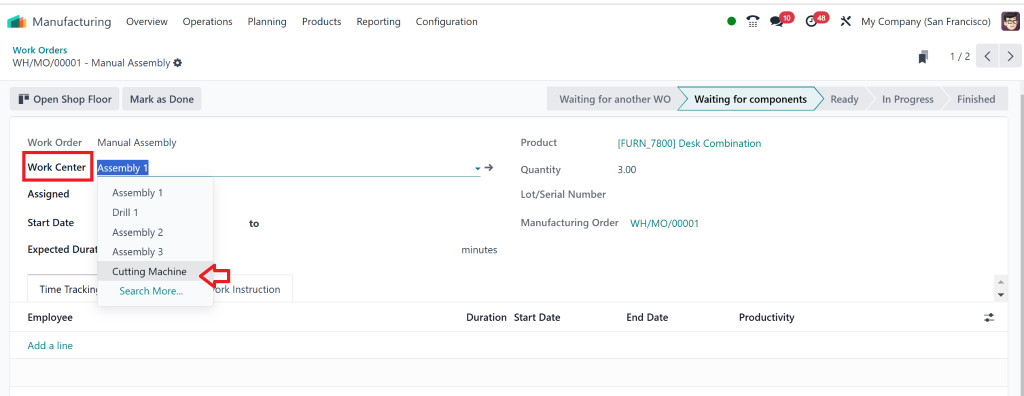
You’ll see a field where you can select the Work Center. From the dropdown, choose the one you just created.
Doing this ensures the task is assigned to the right place – no more mix-ups or delays.
Step 4: Monitor Performance and Improve
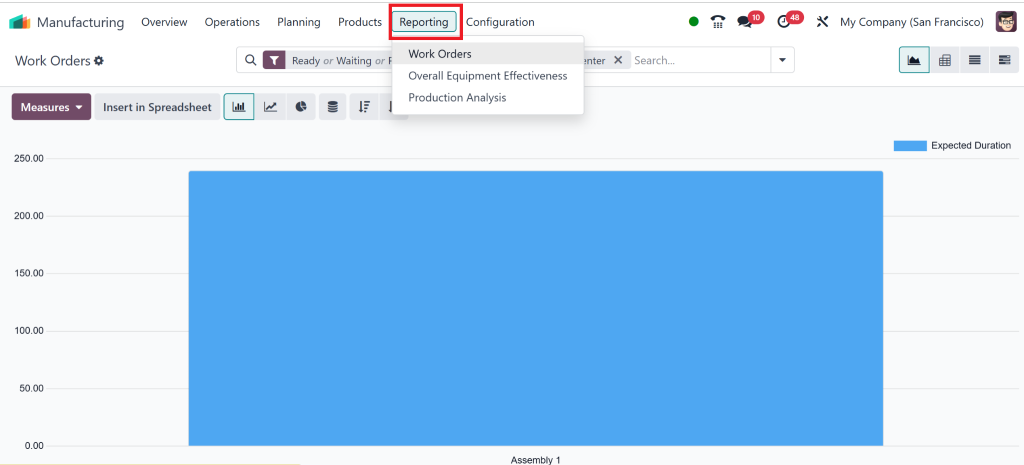
Once everything’s set up, it’s time to keep an eye on how your work centers are performing. Odoo provides fantastic reporting tools that show you the performance of each work center in real-time. These reports will tell you:
How long tasks take to complete
Which work centers are being over- or under-utilized
Whether you’re meeting your production targets
With this data, you can tweak and optimize your setup. For example, if a work center lags, you may need to add more resources or adjust the lead time. Or if one is consistently under-utilized, you could reassign some tasks.
Best Practices for Odoo Production Work Centers
It’s great that you’ve set up your Odoo 18 work centers, but there are a few best practices to keep in mind so that you get the most out of them:
Match Your Work Centers to Your Workflow
Make sure your work centers match your business’s actual workflow. If you have several machines, designate them as separate work centers. If you have assembly lines, set them up accordingly. The more you align with the real-world process, the better your system will perform.
Don’t Overload Your Work Centers
I can’t stress this enough: don’t overload your work centers. If you try to cram too much into one work center, things will slow down, and your productivity will take a hit. Spread out the tasks across multiple work centers to keep everything moving efficiently.
Regularly Review Work Center Performance
Ongoing monitoring is key. Don’t just sit and forget. Regularly review the performance of your work centers and adjust your setup if you notice any inefficiencies.
Lift Your Efficiency with Odoo Manufacturing Tutorial
There you have it! By now, you should have a solid understanding of creating work centers in Odoo 18 and why they’re essential for keeping your production on track. Once you set them up, you’ll have better control over your workflow, improved resource allocation, and the ability to make smarter decisions based on real-time data.
Remember, Odoo work centers implementation are about helping you work smarter, not harder. If you follow the steps in this guide, you can organize and streamline your manufacturing process like never before.
Feel free to reach out if you’re stuck or need expert help to set up Odoo 18 work centers in your business. We’re here to help make your manufacturing operations as smooth and efficient as possible.
Hi, I'm Nabia, an Odoo ERP functional & technical content writer. I specialize in blogs, social media content, ad copy, landing pages, service pages, and email campaigns.
We use cookies to ensure that we give you the best experience on our website. If you continue to use this site we will assume that you are happy with it.