
Firebase Authentication offers easy integration with Flutter through its well-documented SDKs, significantly reducing development time. Developers can quickly add authentication features without building complex backend systems, making Firebase an efficient choice for handling user authentication in mobile applications. With minimal setup, Firebase Auth flawlessly integrates into Flutter apps, allowing developers to focus on building engaging user experiences.
How to Implement Firebase Authentication in your Flutter Application: A Step-by-Step Guide
Create a Flutter Project
Open your terminal or IDE (like Android Studio or Visual Studio Code) and run the following command in terminal to create a new Flutter project:
- flutter create you_project_name
- Flutter create firebase-login
Set Up a Firebase Project
- Sign to Firebase.
- SignIn the Firebase console ,click add Project (or Create a project), and enter a name for your Firebase project(for example, “firebase-login).
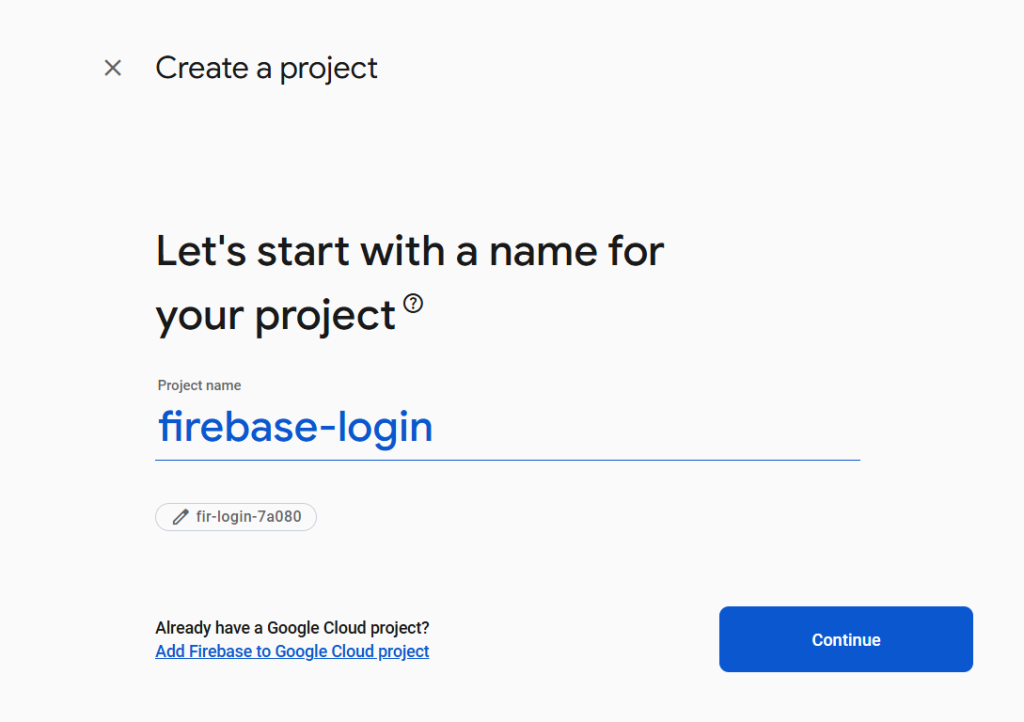
- Click through the project creation options. If prompted, accept the Firebase terms. Skip setting up Google Analytics because you won’t be using Analytics for this app.
- Once your Firebase project is ready, you must register your Flutter app (both for Android and iOS, if needed).
Enable email sign-in for Firebase Authentication
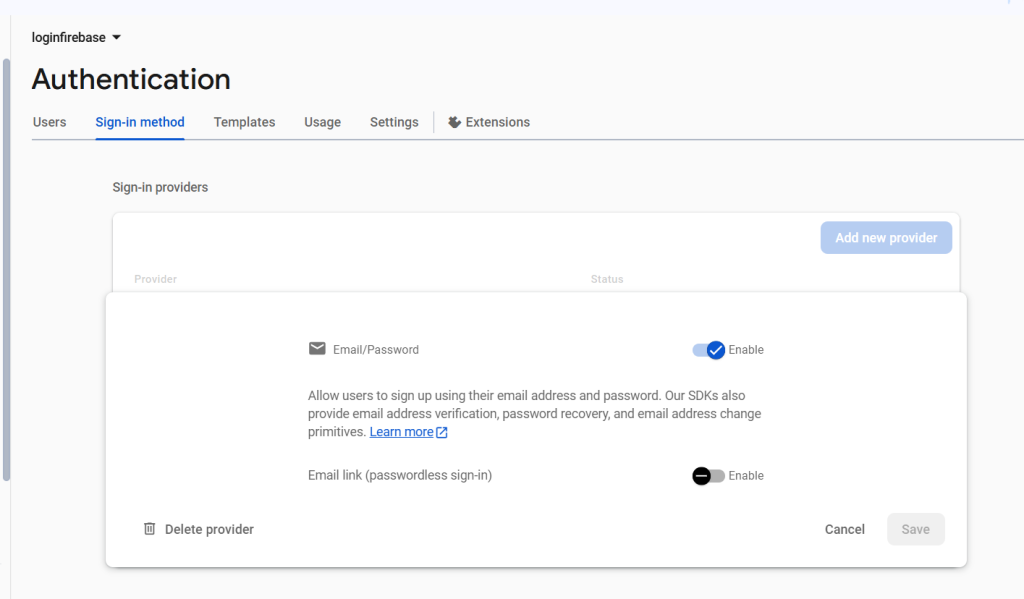
The app that you’re building uses Firebase Authentication to allow your users to sign in to your app. It also allows new users to register from the Flutter application.To allow users to sign in to the web app, you’ll first use the Email/Password sign-in method. Later, you’ll add the Google Sign-In method.
- In the Firebase console, expand the Build menu in the left panel.
- Click Authentication, click the Get Started button, then the Sign-in method tab Click Email/Password in the Sign-in providers list, set the Enable switch to the on position, and then click Save.
Register Your Flutter App with Firebase
For Android:
- In the Firebase Console, click on the Android icon to register your app.
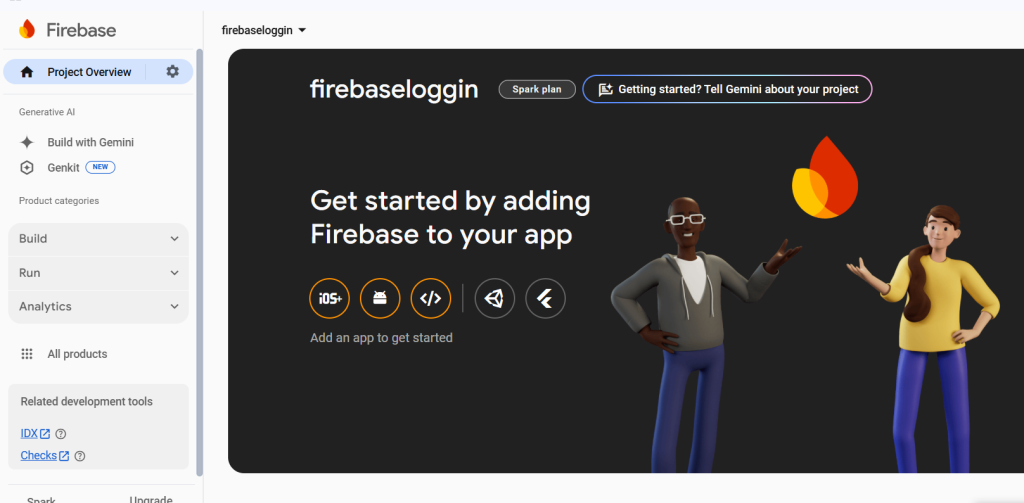
- Enter your Android package name. You can find it in your Flutter project at android/app/src/main/AndroidManifest.xml under the package attribute.
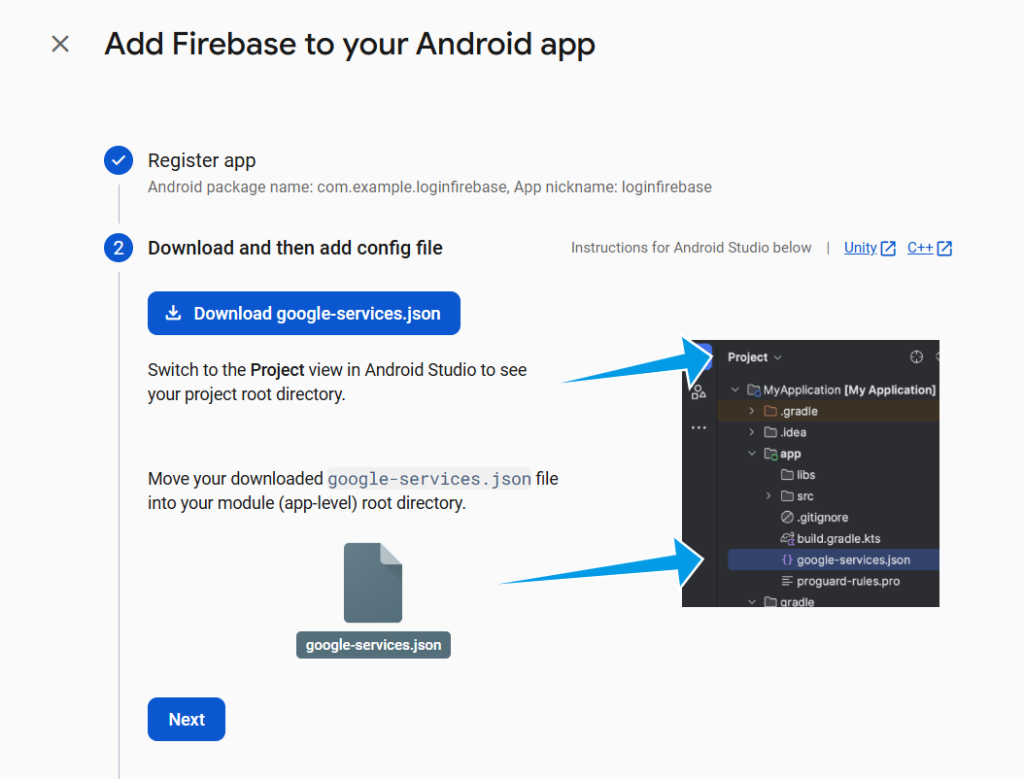
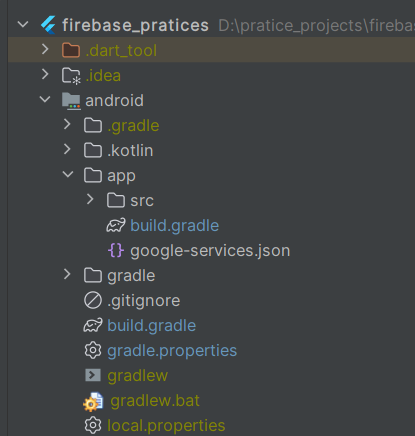
- Download the google-services.json file and place it in your Flutter project’s android/app directory.
For iOS:
- Click on the iOS icon in the Firebase Console.
- Enter your iOS bundle identifier. You can find it in your Flutter project at ios/Runner.xcodeproj/project.pbxproj under the PRODUCT_BUNDLE_IDENTIFIER setting.
- Download the GoogleService-Info.plist file and place it in your Flutter project’s ios/Runner directory.
Open ios/Runner.xcworkspace in Xcode and ensure the GoogleService-Info.plist is included in your app’s build.
Install Firebase Packages
Add the necessary Firebase packages to your pubspec.yaml file, including firebase_core and firebase_auth, then run flutter pub get:
					dependencies:
 flutter:
   sdk: flutter
 cupertino_icons: ^1.0.6
 firebase_core: ^3.5.0
 firebase_auth: ^5.3.0
 cloud_firestore: ^5.4.2
Initialize Firebase in Flutter
Initialize Firebase within your app by adding the following code in your main.dart file:
					void main() async {
 WidgetsFlutterBinding.ensureInitialized();
 await Firebase.initializeApp();
 runApp(MyApp());
}
- WidgetsFlutterBinding.ensureInitialized() prepares Flutter to handle asynchronous code at startup.
- Firebase.initializeApp() connects your app to Firebase, allowing you to use services like Authentication.
- runApp(MyApp()) starts the app once Firebase is ready.
Structuring Flutter App: Login, Signup, and Home Screens
Now that your Flutter project is connected to Firebase, the next step is to set up the structure of your app. For a basic authentication flow, you’ll need to create the following key screens:
Login Screen:
A screen where users can log in using their email and password.
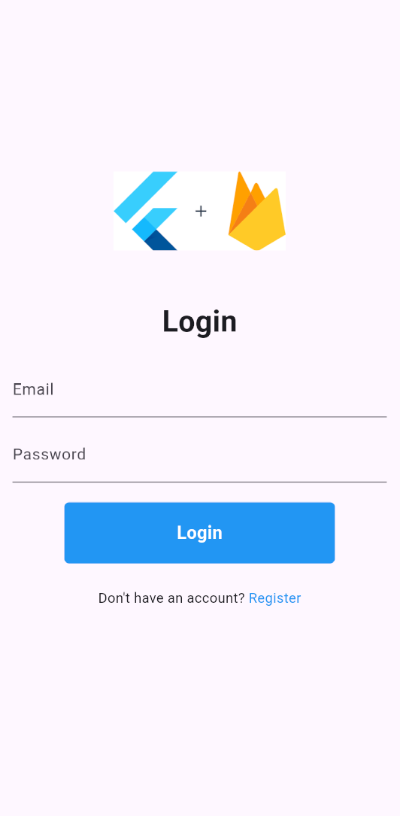
Import Firebase Authentication: import ‘package:firebase_auth/firebase_auth.dart’;
Initialize FirebaseAuth: final FirebaseAuth _auth = FirebaseAuth.instance;
Authenticate a user by checking the provided email and password asynchronously:
					final user = await _auth.signInWithEmailAndPassword(
 email: emailController.text.trim(),
 password: passwordController.text.trim(),);
Here is the full code for Login Page:
					import 'package:flutter/material.dart';
import 'package:get/get.dart';
import 'package:firebase_auth/firebase_auth.dart';
import 'package:loginfirebase/firebaselog/authhome.dart';
import 'signUp.dart';
class LoginScreen extends StatelessWidget {
 final TextEditingController emailController = TextEditingController();
 final TextEditingController passwordController = TextEditingController();
 LoginScreen({super.key});
 final FirebaseAuth _auth = FirebaseAuth.instance;
 Future signIn() async {
   try {
     final user = await _auth.signInWithEmailAndPassword(
       email: emailController.text.trim(),
       password: passwordController.text.trim(),);
     if (user != null) {
       Get.offAll(ProfileScreen());
     }
   } catch (e) {
     Get.snackbar("Login Failed", e.toString(), snackPosition: SnackPosition.BOTTOM);
   }
 }
 @override
 Widget build(BuildContext context) {
   final size = MediaQuery.of(context).size;
   return Scaffold(
     body: Padding(
       padding: const EdgeInsets.all(16.0),
       child: Column(
         mainAxisAlignment: MainAxisAlignment.center,
         children: [
           Image.asset('asset/images.png', height: 80),
           const SizedBox(height: 50),
           const Text('Login', style: TextStyle(fontSize: 30, fontWeight: FontWeight.bold)),
           const SizedBox(height: 20),
           TextField(
             controller: emailController,
             decoration: const InputDecoration(labelText: 'Email', border: UnderlineInputBorder()),
           ),
           const SizedBox(height: 10),
           TextField(
             controller: passwordController,
             obscureText: true,
             decoration: const InputDecoration(labelText: 'Password', border: UnderlineInputBorder()),
           ),
           const SizedBox(height: 20),
           GestureDetector(
             onTap: signIn,
             child: Container(
               height: size.height / 14,
               width: size.width / 1.5,
               decoration: BoxDecoration(
                 borderRadius: BorderRadius.circular(5),
                 color: Colors.blue,
               ),
               alignment: Alignment.center,
               child: const Text(
                 "Login",
                 style: TextStyle(color: Colors.white, fontSize: 18, fontWeight: FontWeight.bold),
               ),
             ),
           ),
           const SizedBox(height: 25),
           Row(
             mainAxisAlignment: MainAxisAlignment.center,
             children: [
               const Text("Don't have an account? "),
               GestureDetector(
                 onTap: () => Get.offAll(SignUp()),
                 child: const Text('Register', style: TextStyle(color: Colors.blue)),
               ),
             ],
           ),
         ],
       ),
     ),
   );
 }
}
Signup Screen:
A screen where new users can create an account by signing up with their email and password.
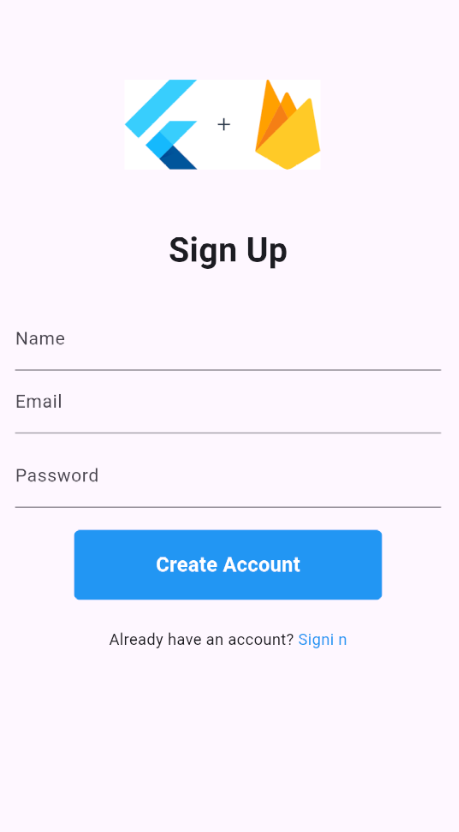
After successful creation, it retrieves the UID and stores the user’s information in Firestore.
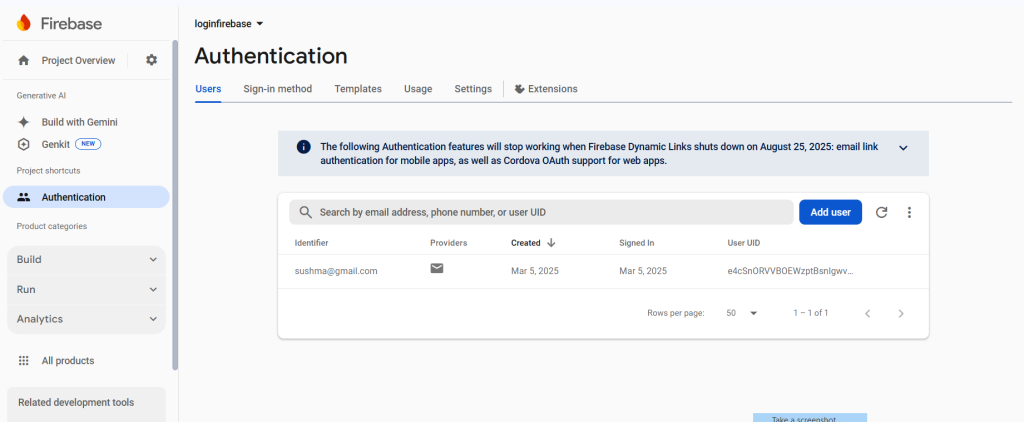
Create a New User: Use the following line to register a new user with an email and password retrieved from text controllers:
					await _auth.createUserWithEmailAndPassword(
 email: emailController.text.trim(),
 password: passwordController.text.trim(),
);
Here is the full code for Sign Up Page:
					import 'package:flutter/material.dart';
import 'package:get/get.dart';
import 'package:firebase_auth/firebase_auth.dart';
import 'package:loginfirebase/firebaselog/authhome.dart';
import 'package:loginfirebase/firebaselog/login.dart';
class SignUp extends StatelessWidget {
 final TextEditingController emailController = TextEditingController();
 final TextEditingController nameController = TextEditingController();
 final TextEditingController passwordController = TextEditingController();
 SignUp({super.key});
 final FirebaseAuth _auth = FirebaseAuth.instance;
 Future signUp() async {
   try {
     final user= await _auth.createUserWithEmailAndPassword(
       email: emailController.text.trim(),
       password: passwordController.text.trim(),
     );
     if (user!=null){
     Get.offAll(ProfileScreen());
     }
   } catch (e) {
     Get.snackbar("Sign Up Failed", e.toString(), snackPosition: SnackPosition.BOTTOM);
   }
 }
 @override
 Widget build(BuildContext context) {
   final size = MediaQuery.of(context).size;
   return Scaffold(
     body: Padding(
       padding: const EdgeInsets.all(16.0),
       child: Column(
         mainAxisAlignment: MainAxisAlignment.center,
         children: [
           Image.asset('asset/images.png', height: 80),
           const SizedBox(height: 50),
           const Text('Sign Up', style: TextStyle(fontSize: 30, fontWeight: FontWeight.bold)),
           const SizedBox(height: 20),
           TextField(
             controller: nameController,
             decoration: const InputDecoration(labelText: 'Name', border: UnderlineInputBorder()),),
           TextField(
             controller: emailController,
             decoration: const InputDecoration(labelText: 'Email', border: UnderlineInputBorder())),
           const SizedBox(height: 10),
           TextField(
             controller: passwordController,
             obscureText: true,
             decoration: const InputDecoration(labelText: 'Password', border: UnderlineInputBorder()),),
           const SizedBox(height: 20),
           GestureDetector(
             onTap: signUp,
             child: Container(
               height: size.height / 14,
               width: size.width / 1.5,
               decoration: BoxDecoration(
                 borderRadius: BorderRadius.circular(5),
                 color: Colors.blue,
               ),
               alignment: Alignment.center,
               child: const Text(
                 "Create Account",
                 style: TextStyle(color: Colors.white, fontSize: 18, fontWeight: FontWeight.bold), ),),),
           const SizedBox(height: 25),
           Row(
             mainAxisAlignment: MainAxisAlignment.center,
             children: [
               const Text("Already have an account? "),
               GestureDetector(
                 onTap: () => Get.offAll(LoginScreen()),
                 child: const Text('Sign in', style: TextStyle(color: Colors.blue)),
               ),
             ],
           ),
         ],
       ),
     ),
   );
 }
}
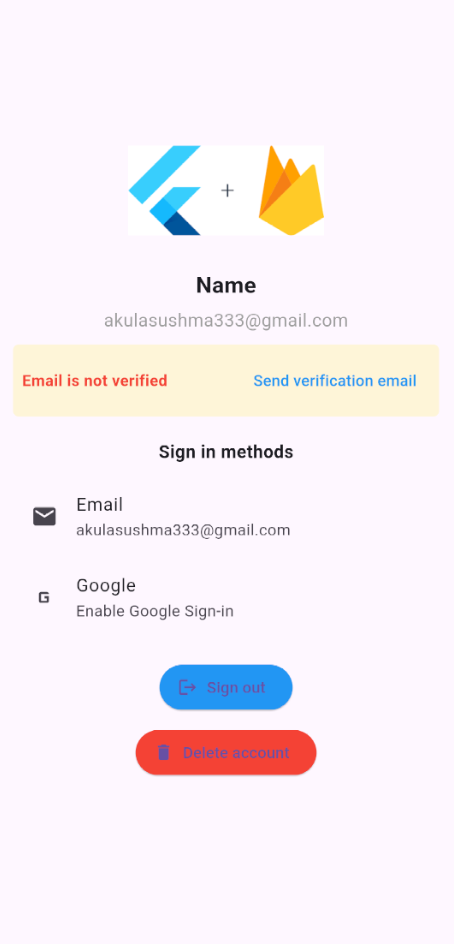
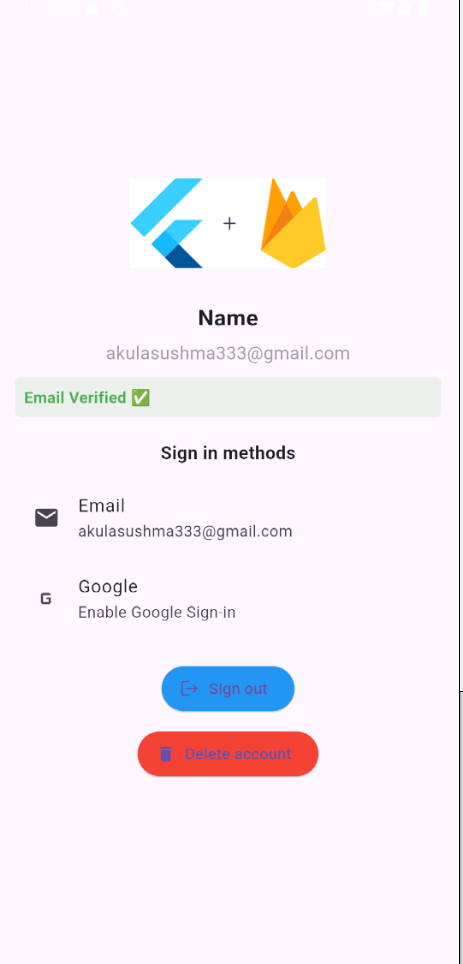
Home Screen:
The main screen that users see after successfully logging in. When the email is not verified.
When the email is verified.
Delete authentication account:
Ensure the user is recently authenticated, or Firebase will throw an error. If needed, re-authenticate before deleting.
await _auth.currentUser?.delete();
Here is the full code for Home Page:
					import 'package:flutter/material.dart';
import 'package:firebase_auth/firebase_auth.dart';
import 'package:cloud_firestore/cloud_firestore.dart';
import 'package:loginfirebase/firebaselog/chatscreen.dart';
class ChatHomeScreenpage extends StatelessWidget {
 final FirebaseAuth _auth = FirebaseAuth.instance;
 @override
 Widget build(BuildContext context) {
   return Scaffold(
     appBar: AppBar(title: Text("Chats"), actions: [
       IconButton(onPressed: () => _auth.signOut(), icon: Icon(Icons.logout))
     ]),
     body: StreamBuilder(
       stream: FirebaseFirestore.instance.collection("users").snapshots(),
       builder: (context, snapshot) {
         if (!snapshot.hasData) return CircularProgressIndicator();
         final users = snapshot.data!.docs;
         return ListView.builder(
           itemCount: users.length,
           itemBuilder: (context, index) {
             final user = users[index];
             return ListTile(
               title: Text(user["email"]),
               onTap: () => Navigator.push(
                 context,
                 MaterialPageRoute(
                   builder: (_) => ChatScreen(
                     chatId: user.id,
                     receiverId: user.id,
                     receiverName: user["email"],
                   ),
                 ),
               ),
             );
           },
         );
       },
     ),
   );
 }
}
Each of these screens will work together to provide a smooth user experience. Following these steps, you can effectively implement Firebase Authentication in your Flutter application, ensuring a secure and smooth user authentication process.
Secure User Management with Firebase Authentication
Firebase Authentication provides a secure, scalable, and efficient solution for managing user authentication in Flutter applications. With its easy integration, support for multiple authentication methods, and automatic session management, developers can implement robust security features with minimal effort. By enforcing best security practices such as email verification, strong password policies, and biometric authentication, apps can offer a smooth yet highly secure user experience. Firebase’s custom authentication options allow integration with third-party identity providers and custom backends for added flexibility. Its built-in user management features, including password resets and account verification, ensure smooth handling of user accounts. Firebase Authentication is a reliable and powerful tool for building secure, user-friendly mobile applications.