How to Record Expenses in Odoo 18 Accounting Module?
Why Record Expenses in Odoo 18?
Welcome Readers! One of the most essential and complex tasks when managing business finances is accurately recording Odoo 18 accounting expenses. Regardless of size, every business incurs various expenses – office supplies, vendor payments, or employee reimbursements. If you want to keep track of these expenses, save time on manual accounting, and avoid errors, Odoo 18 offers a comprehensive solution.
Recording expenses is an essential part of your business’s financial management. The Odoo 18 record expenses feature helps you document each cost and ensures they are correctly classified and tracked for reporting purposes. With Odoo 18 expense management, you can control your spending and ensure everything is accounted for.
In this guide, we’ll walk you through the Odoo 18 expense entry process, managing Odoo 18 vendor bills, and how Odoo 18 expense tracking can simplify your life.
By the end, you’ll clearly understand how to use Odoo 18 for your business’s accounting needs.
How to Record Data in Odoo 18 Accounting Expense Module?
Recording expenses in Odoo 18 might seem exhausting, but it’s incredibly intuitive once you get familiar with the system. The Odoo 18 accounting module is designed to streamline your accounting processes, saving time and reducing errors. Let’s break down how to record and manage your expenses in simple steps.
Step-by-Step Process for Odoo 18 Expense Entry
The first thing you’ll need to do is enter your expenses into the system. Here’s how to get started:
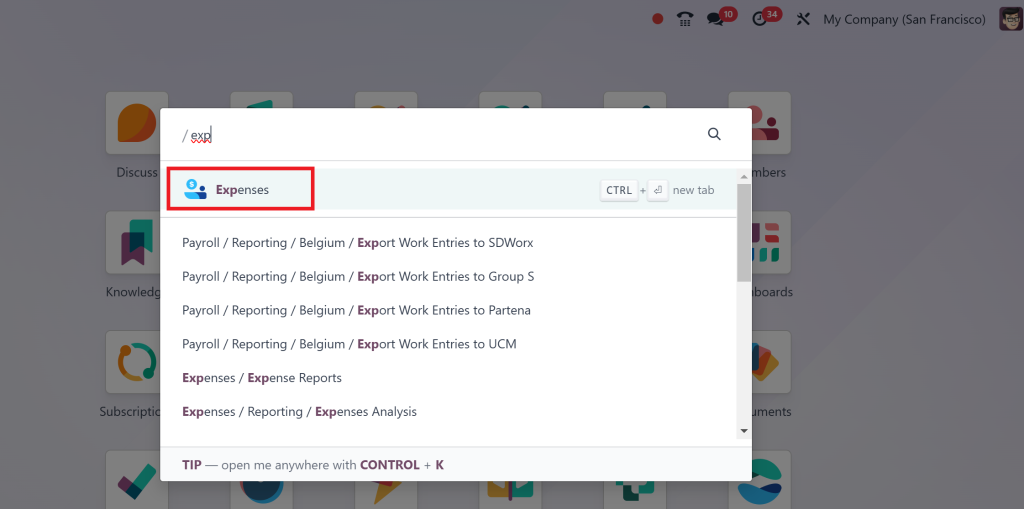
Go to the Expenses Menu:
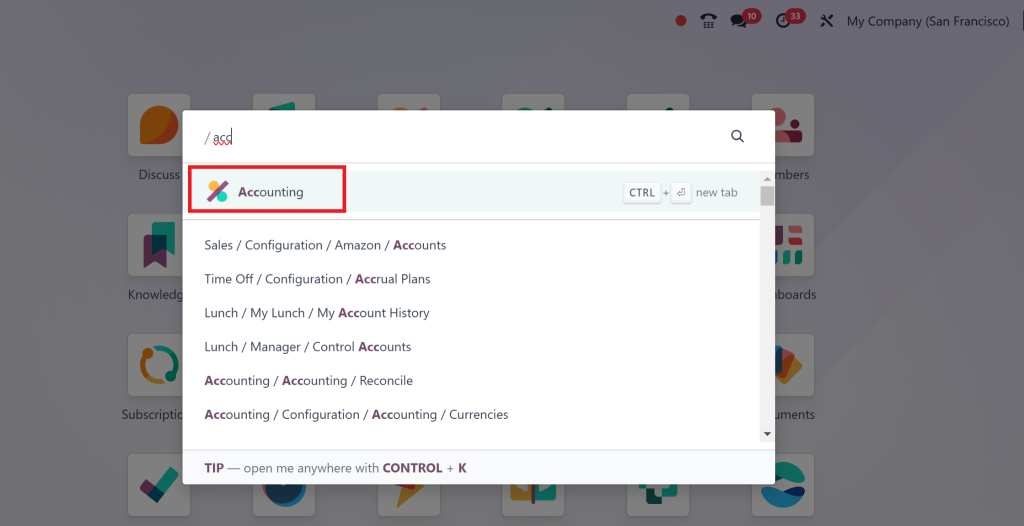
Once you’ve logged into Odoo 18, Open Expense App
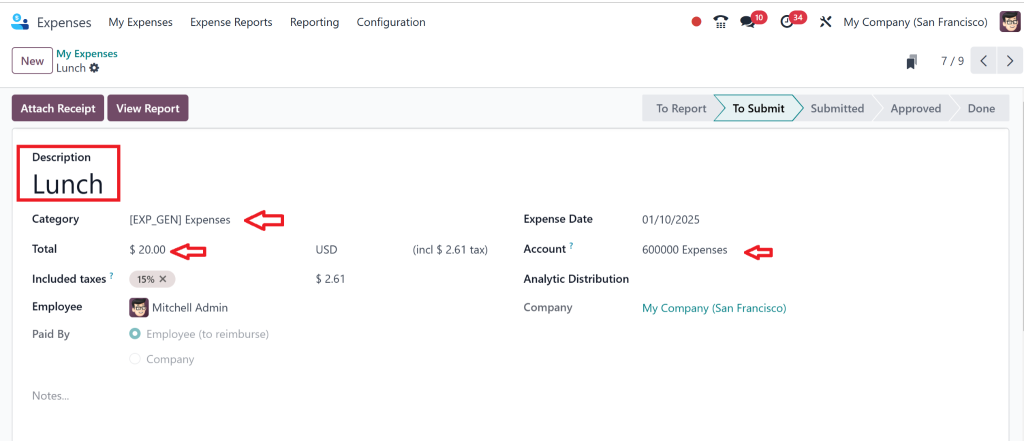
Add Expense Detail
Amount: Enter the exact amount of the expense.
Payment Method: You can select whether the expense was paid via cash, bank, or credit card.
Vendor Name: If you are recording an expense related to a supplier, enter the vendor’s name.
Allocate to the Right Account:
You must ensure the expense is linked to the correct account. That could be an office supply expense, a travel account, or a utility bill. Odoo 18 allows you to set up multiple expense accounts so your financial reporting remains accurate.
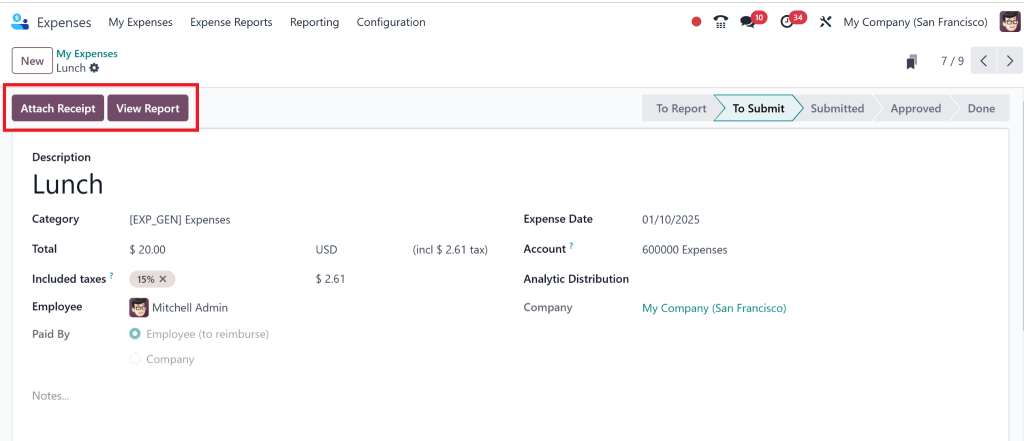
Attach Receipts or Invoices:
You can upload images or PDFs of receipts or invoices related to the expense. This feature is handy for record-keeping and audit purposes.
Save and Validate Odoo 18 Accounting Tutorial:
Once everything is filled in, click Save. If you are ready to confirm the expense, click Validate. The cost will be recorded in the system, and you can track it easily.
Then, open the Accounting app.
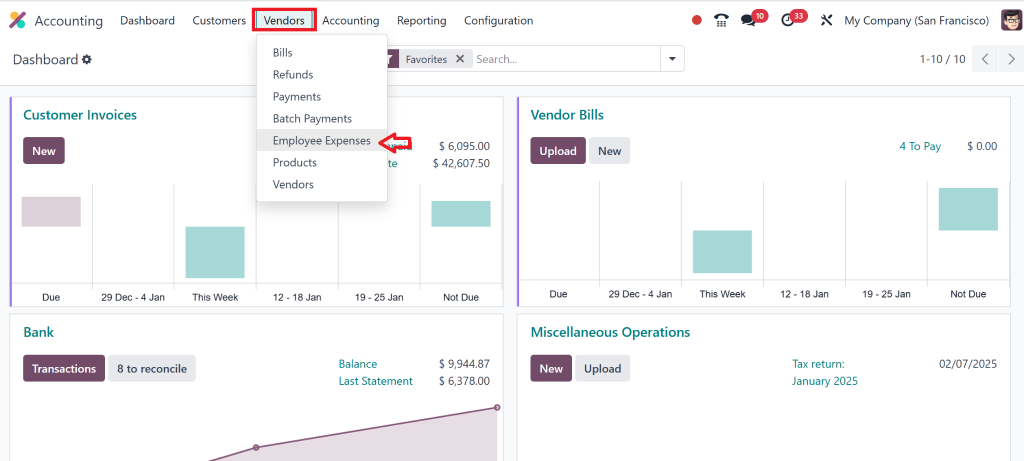
From there, click on the Vendor then Customer Expenses tab on the left.
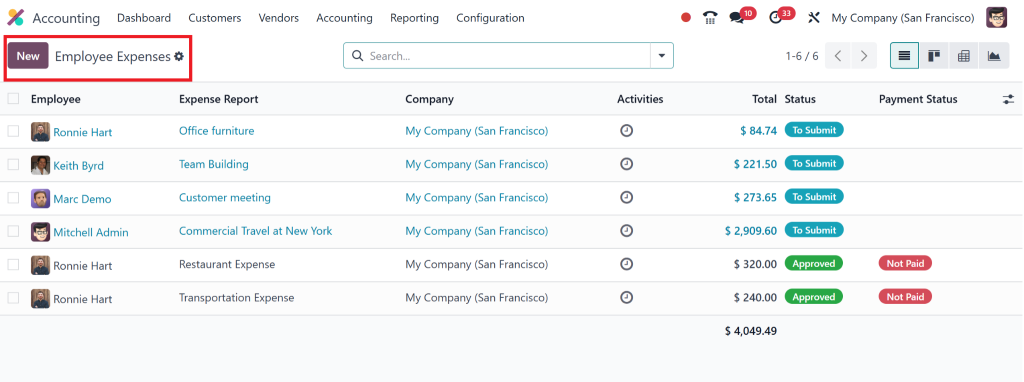
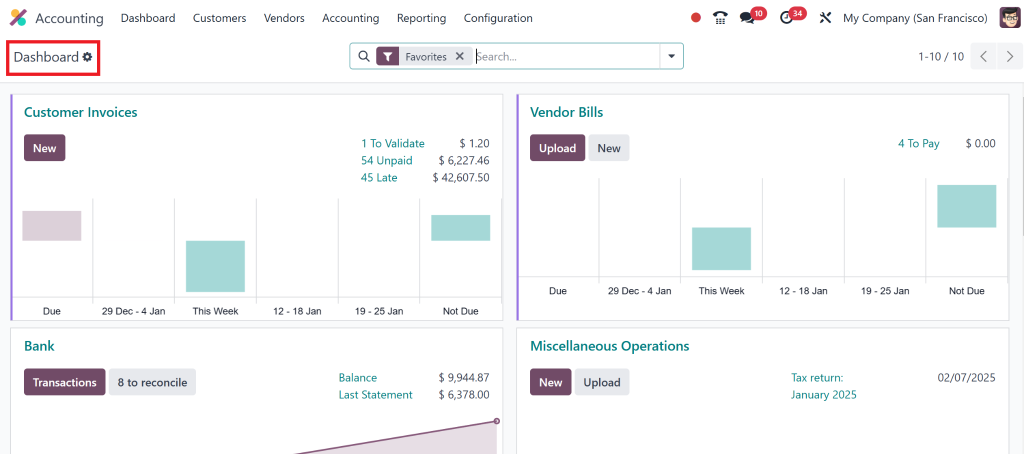
That will open the expense dashboard to see all your recorded expenses.
Creating a New Expense:
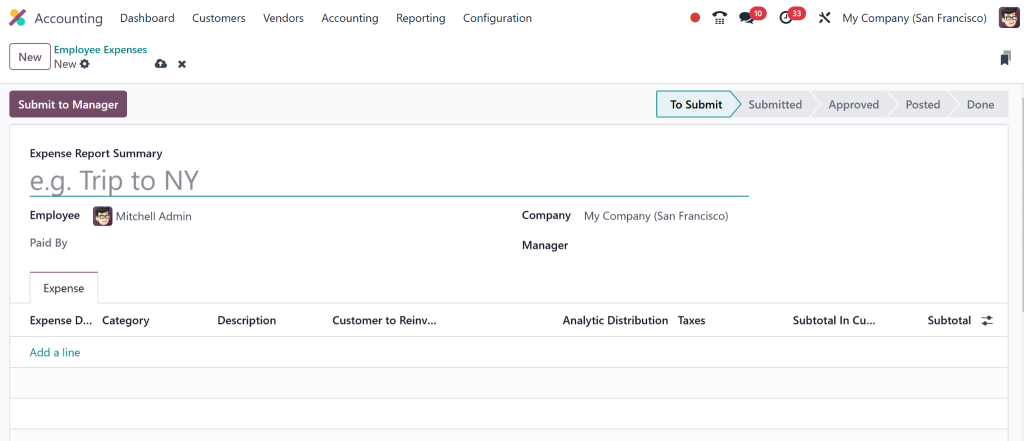
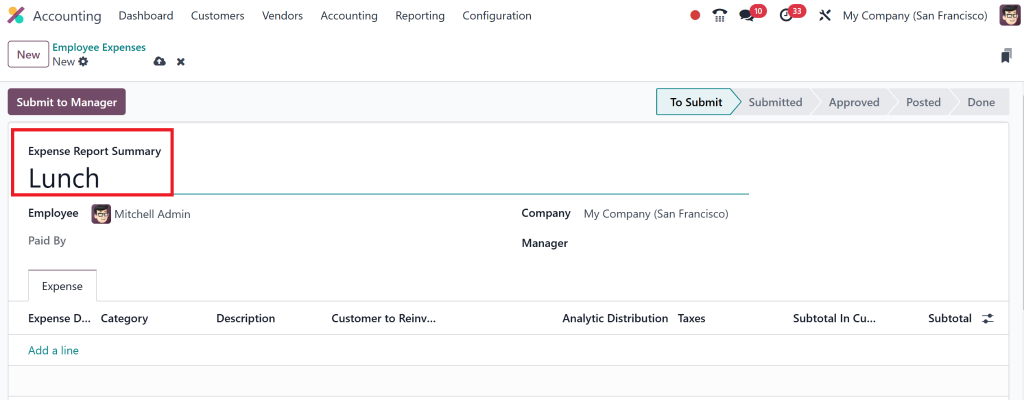
Click on Create to start a new expense entry. A simple form will appear, which you must fill out.
Enter the Expense Details:
Expense Type: Select the type of expense you’re recording (e.g., travel, meals, office supplies). This classification helps you track expenses by category.
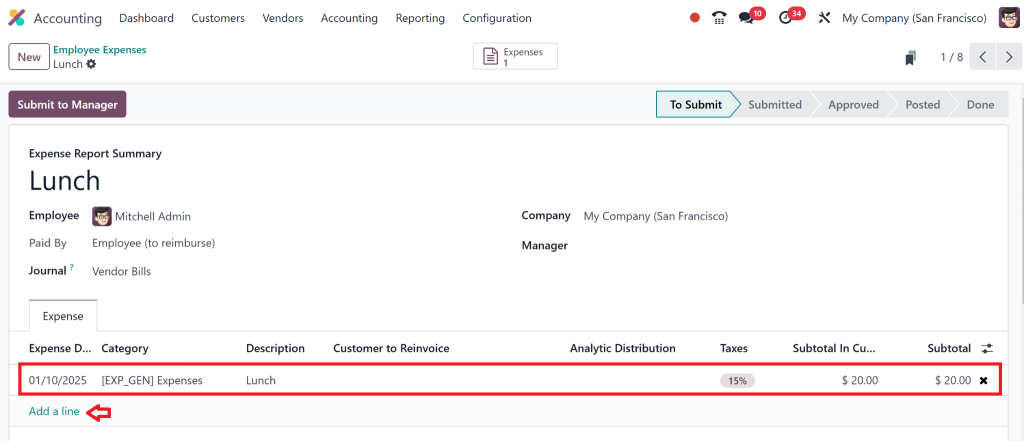
Then, “Add an Expense Line”
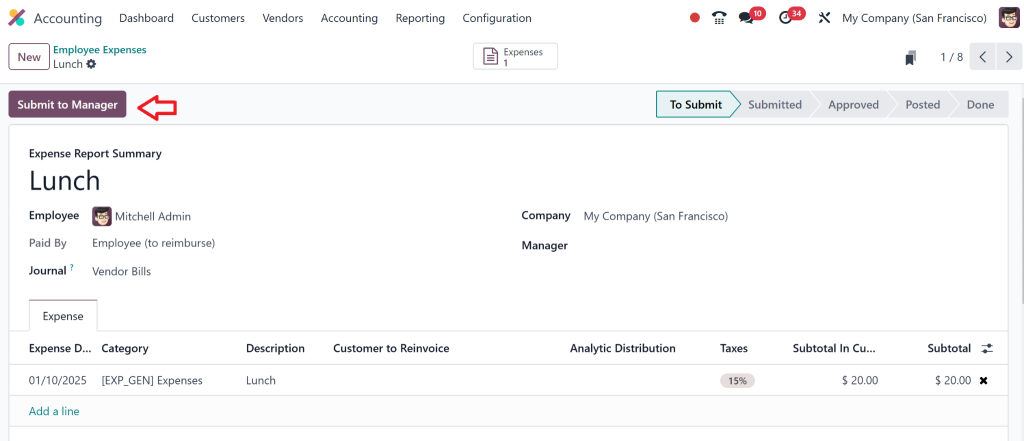
Then, Click on “Submit to Manager”
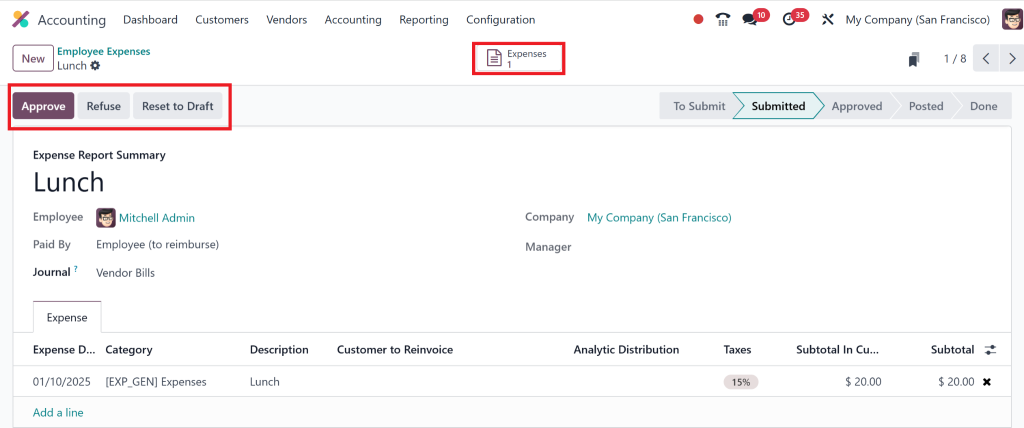
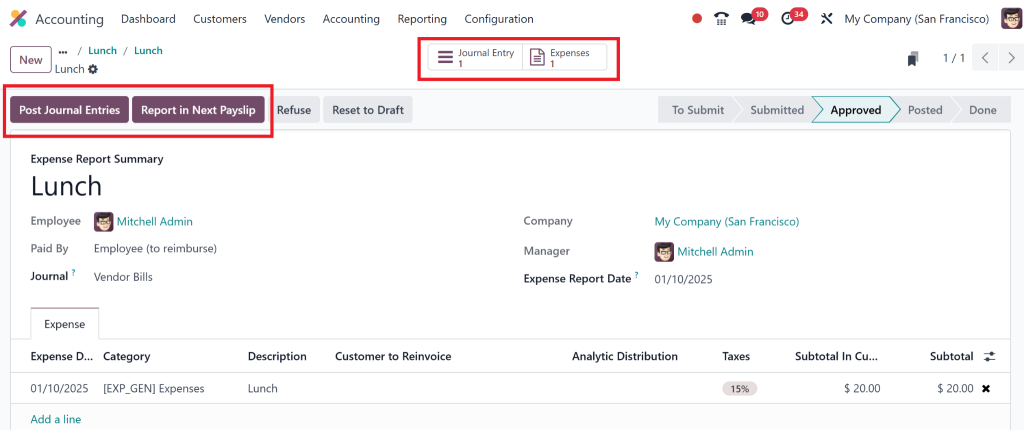
After Submit to the manager, the manager can approve it or reject it by clicking the ‘Approve’ or ‘Refuse’ Tabs.
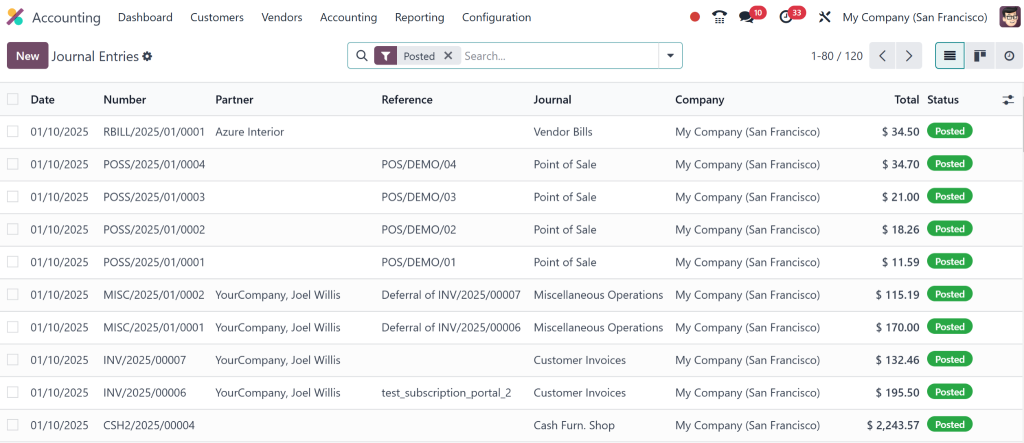
After approval from the manager, we can post journal entries or reports on a payslip.
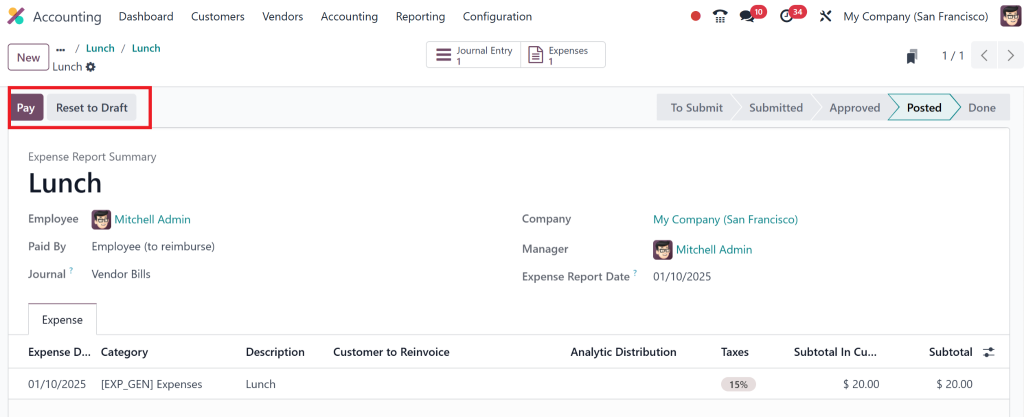
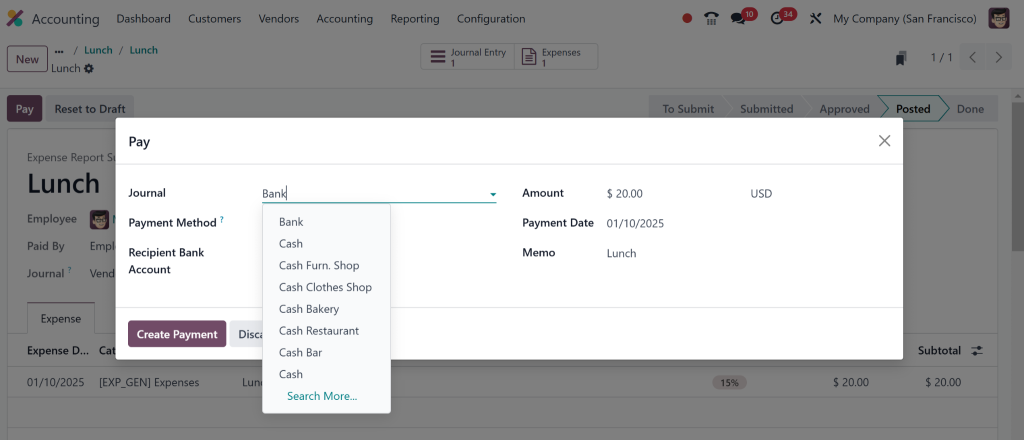
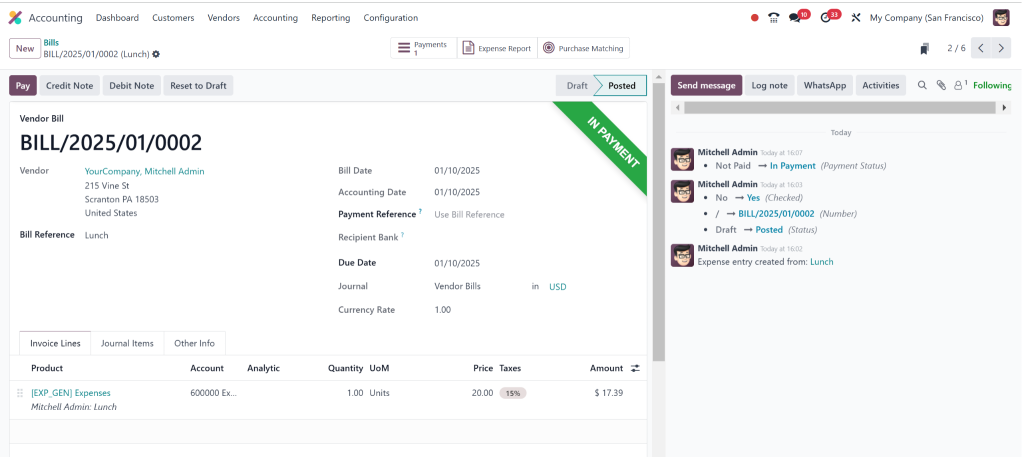
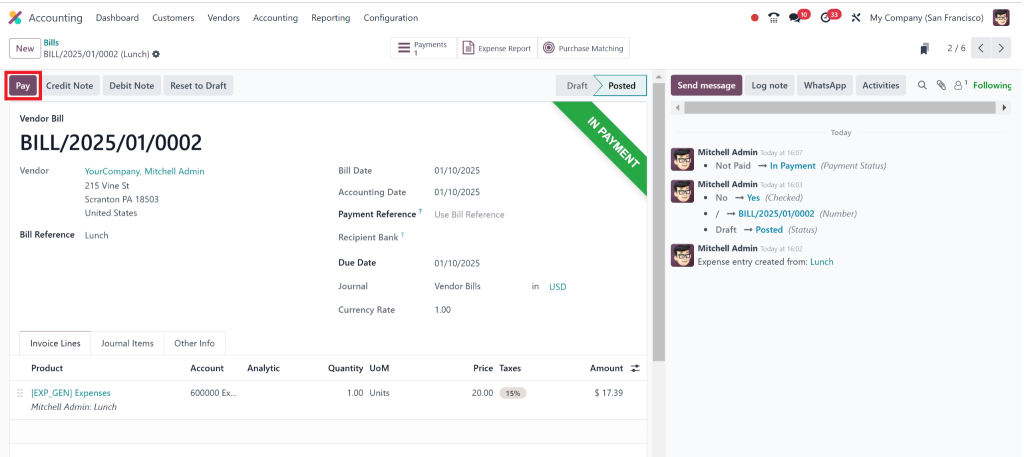
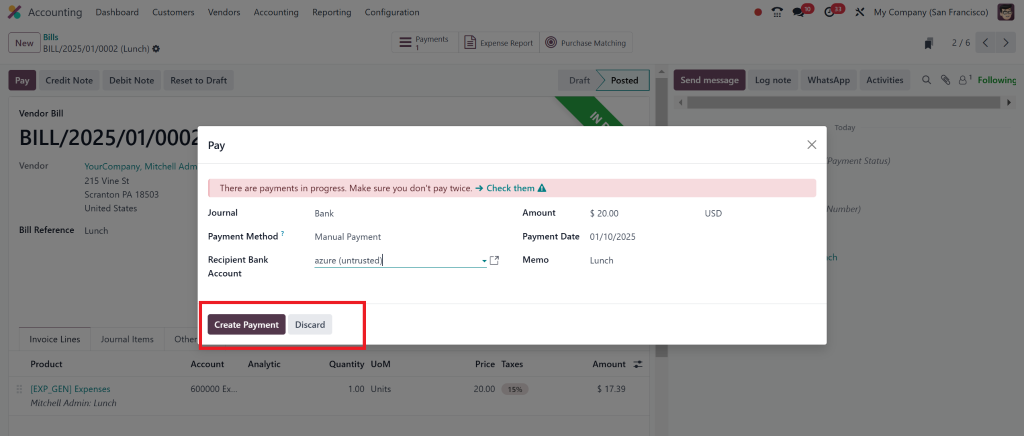
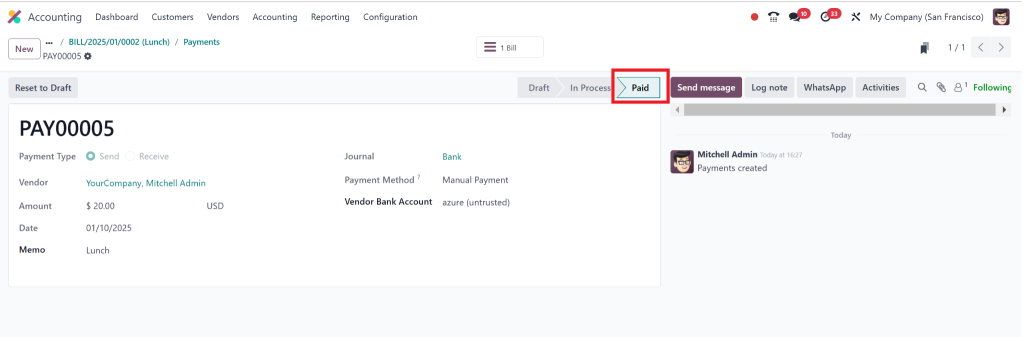
We select “Post Journal Entries”, so after clicking on it we have to click on “Pay”.
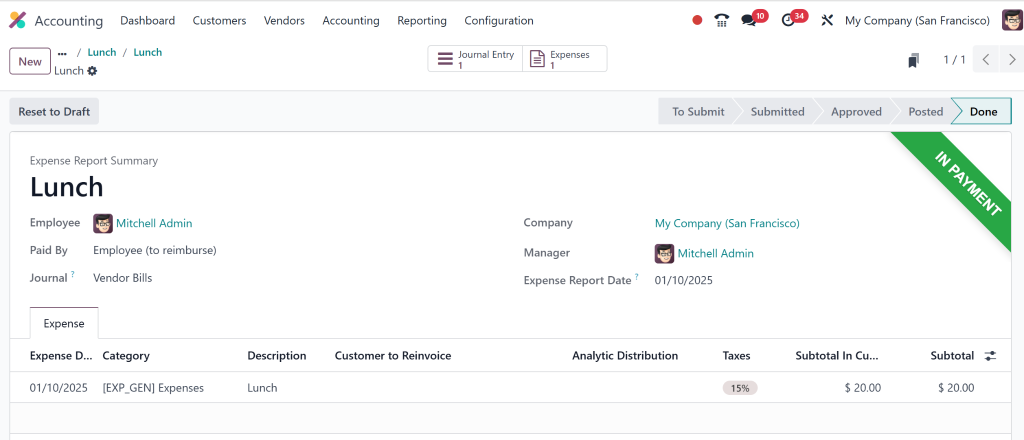
Fill out the whole details appropriately.
This simple process allows you to manage all your expenses from one central location, making it easier to track and report your business’s financial activities.
Managing Odoo 18 Expense Tracking
Keeping track of your expenses is just as crucial as entering them. Odoo 18 expense tracking gives you a real-time view of your business’s outgoings so you can stay on top of your financial health. The system automatically categorizes and tracks all expenses, which helps you understand your spending patterns.
How to Access and View Your Odoo 18 Record Expense Dashboard
Expense Dashboard Overview:
From the Expenses tab, you’ll see a comprehensive dashboard of all recorded expenses. This includes the expense amount, date, vendor, and status (draft, confirmed, etc.).
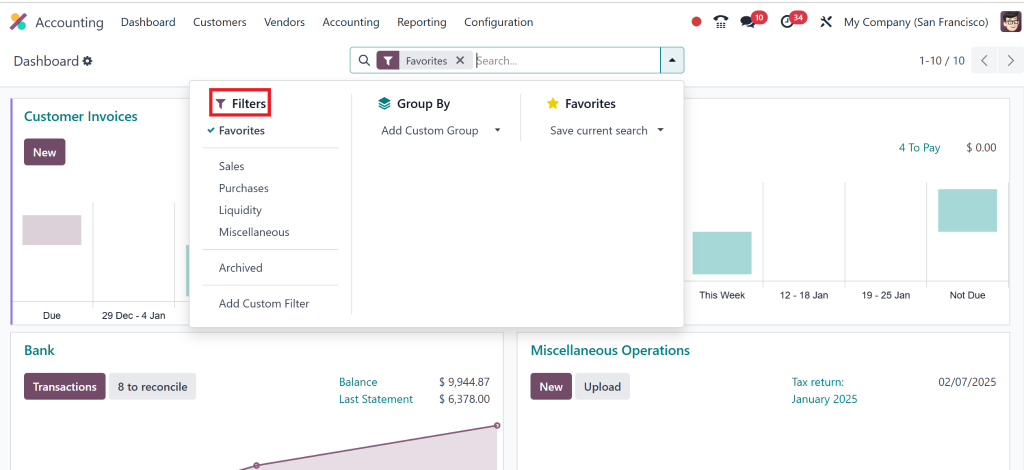
Filter and Sort Expenses:
Odoo 18 allows you to filter expenses by various parameters, such as category, vendor, or date. That can be especially useful if you want to view specific types of costs (like travel or office supplies) or if you’re preparing for a tax audit.
Track Expenses by Vendor:
You can also track your expenses through the vendor. This feature helps you monitor how much you’ve spent with a particular supplier over a specific period. It’s helpful when you need to assess vendor relationships or manage payments.
Analyze Expense Reports:
You can quickly generate reports that summarize your business’s expenses. These reports can be filtered by date range, expense category, and vendor. That gives you a clear picture of your spending and allows you to make informed financial decisions.
How to Record Odoo 18 Vendor Bills
In addition to tracking expenses, Odoo 18 allows you to record vendor bills directly into the system. Managing vendor bills efficiently is crucial for any business, as it ensures timely payments and helps maintain good relationships with suppliers.
Steps to Record Vendor Bills
Go to Vendor Bills:
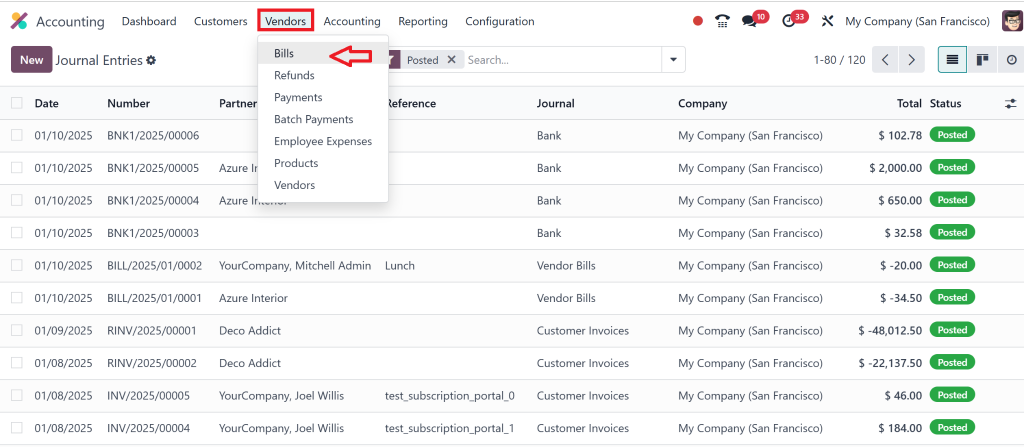
Go to the Accounting app, then select Vendor Bills from the menu. That will allow you to record new bills from your suppliers.
Create a New Vendor Bill:
Click on Create and fill out the bill details, such as:
Vendor Name: The supplier from which you received goods or services.
Bill Amount: The total amount of the bill.
Expense Category: The relevant category for the bill (e.g., office supplies, utilities, etc.).
Invoice Date and Due Date: The date the bill was issued and the payment due date.
Match the Vendor Bill with the Expense:
If the vendor bill corresponds to an expense you’ve already entered, Odoo 18 allows you to link them together, keeping everything organized and up to date.
Validate and Pay the Bill:
Once the bill is created, you can pay or validate it and even initiate payment directly from the Odoo 18 platform.
By recording your vendor bills in Odoo 18, you maintain accurate accounts payable records and ensure no bills are overlooked or forgotten.
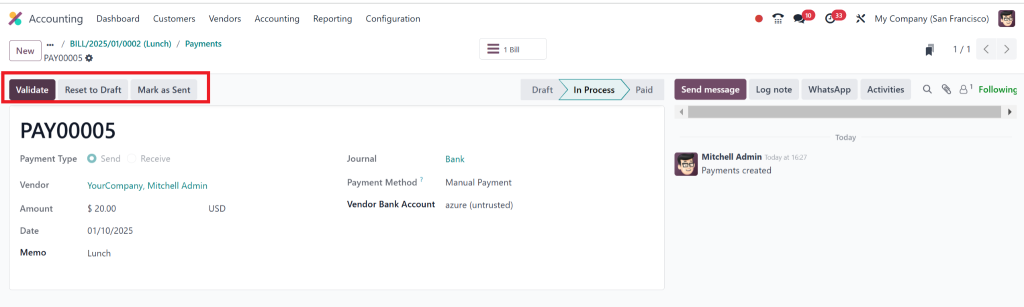
Then click on “Validate”.
The Benefits of Odoo 18 Expense Management
Now that you know how to record expenses and manage vendor bills, let’s discuss the key benefits of using Odoo 18 expense management for your business.
Real-time Expense Tracking:
With Odoo 18 expense tracking, you can view all your expenses in real-time. This enables you to spot trends, identify unnecessary costs, and make data-driven decisions about your spending.
Integration:
Odoo 18 integrates with other modules, such as Inventory and Sales, making tracking expenses related to purchases or sales easier. For instance, when you record a cost for materials purchased, the system automatically updates your inventory.
Accurate Financial Reporting:
The system provides detailed reports on your expenses, which can be exported for accounting purposes or shared with stakeholders. Accurate reporting is key to understanding your financial health and making informed decisions.
Save Time and Reduce Errors:
By automating your expense management and accounting processes, Odoo 18 saves you time and reduces the chances of human error. This allows you to focus on growing your business instead of dealing with complex accounting tasks.
Odoo 18 is the way to go
Recording and managing expenses in Odoo 18 is Groundbreaking for any business. The Odoo 18 accounting module is user-friendly, efficient, and customizable to meet your needs. Whether you’re handling Odoo 18 expense entries, tracking vendor bills, or analyzing your expenses, this platform simplifies your financial processes.
With Odoo 18 expense management, you ensure that your accounts are accurate and improve overall business performance by closely monitoring your financial outgoings. If you want to Update your accounting processes and make smarter financial decisions, Odoo 18 is the way to go.
Start managing your business expenses more smartly with Odoo 18 today!
Hi, I'm Nabia, an Odoo ERP functional & technical content writer. I specialize in blogs, social media content, ad copy, landing pages, service pages, and email campaigns.
We use cookies to ensure that we give you the best experience on our website. If you continue to use this site we will assume that you are happy with it.