
Long-Term Support (LTS) version of Ubuntu 22.04, offering ongoing application updates and critical security patches for five years from its release date. Additionally, standard software updates deliver new Linux kernel versions and graphics driver updates every six months.
In this blog, we’ll set up a development environment for Odoo 16 using the PyCharm IDE on Ubuntu 22.04.
Before configuring PyCharm, we must install the essential libraries and packages required to run Odoo. Let’s go through the setup step by step.
Step 1: Install PyCharm IDE
PyCharm has three main versions: Education, Community, and Professional (previously known as Enterprise). In this tutorial, we’ll set up the Community Edition, a completely free and open-source option.
Before you begin installation, please verify that your system meets the basic requirements to ensure PyCharm runs without issues. You can install PyCharm by downloading the Debian installation package directly from the official website or using the command line.
To install PyCharm via the command line, follow these steps:
Open the terminal using Ctrl + Alt + T.
Run the following commands:
					-> sudo apt-get update
-> sudo apt-get upgrade
-> sudo snap install pycharm-community --classic
Step 2: Install Python 3 and Required Packages
To begin developing with Odoo, Python 3 must be installed along with several supporting packages. You can install Python 3 using the following command:
-> sudo apt install python3-pip
You can install the necessary packages and dependencies for Python 3 using the following command:
-> sudo apt-get install python3-dev build-essential libjpeg-dev libpq-dev libjpeg8-dev libxml2-dev libssl-dev libffi-dev libmysqlclient-dev libxslt1-dev zlib1g-dev libsasl2-dev libldap2-dev liblcms2-dev
Step 3: Install Web Dependencies
Odoo requires several web-related dependencies to support its frontend features and web client interface. You can install these dependencies using the following command:
					-> sudo apt-get install -y npm
-> sudo ln -s /usr/bin/nodejs/usr/bin/node
-> sudo npm install -g less less-plugin-clean-css
-> sudo apt-get install -y node-less
Step 4: Install wkhtmltopdf
Installing wkhtmltopdf is essential for generating PDF reports in Odoo, such as invoices, quotations, and other printable documents. Use the following commands to install it:
					-> sudo        wgethttps://github.com/wkhtmltopdf/wkhtmltopdf/releases/download/0.12.5/wkhtmltox_0.12.5-1.bionic_amd64.deb
-> sudo dpkg -i wkhtmltox_0.12.5-1.bionic_amd64.deb
-> sudo apt install -f
Step 5: Install PostgreSQL
Odoo uses PostgreSQL as its database management system. To install PostgreSQL, run the following command in the terminal:
-> sudo apt-get install postgresql
Once installed, PostgreSQL will automatically start as a background service. You may also need to create a PostgreSQL user for Odoo, which we will cover in a later step.
Step 6: Create a Database User Role for Odoo
After installing PostgreSQL, you need to create a dedicated user role that Odoo will use to manage its databases. This user must have sufficient privileges, and you’ll also need to set a password that will later be referenced in the Odoo configuration file.
					-> sudo su - postgres
    createuser --createdb --username postgres --no-createrole --no-superuser --pwprompt   odoo16
Grant Superuser Privileges to the Odoo Database User
To ensure Odoo has full access to manage its databases and extensions, it’s recommended (especially for development environments) to grant superuser privileges to the user you created.
					-> Psql
    ALTER USER odoo16 WITH SUPERUSER;
Exit from PostgreSQL and Switch Back to the Main User
Once you’ve granted superuser privileges to the Odoo user:
- Exit the PostgreSQL interactive terminal by typing:
						\q
	Exit
Step 7: Download Odoo 16 Source Code
You can obtain the Odoo 16 Community Edition source code either by downloading it directly from Odoo’s official GitHub repository or by cloning the repository using Git.
To clone the repository, first ensure that Git is installed on your system. Then, execute the following commands.
- Install Git (if not already installed):
-> sudo apt-get install git
- The following command will clone the Odoo 16 source code into a directory named odoo16 located inside your home directory:
-> git clone https://www.github.com/odoo/odoo --depth 1 --branch 16.0 --single-branch odoo16
Step 8: Install Required Python Packages
Odoo depends on several Python libraries, all of which are listed in the requirements.txt file located within the odoo16 directory.
To install these dependencies, follow the steps below:
- Navigate to the Odoo 16 source directory:
-> cd odoo16
- Install the required Python packages using pip:
						-> sudo pip3 install -r requirements.txt
			OR
 -> sudo pip3 install -r /requirements.txt
Important: Ensure that all dependencies are installed correctly. Incomplete or improper installation may lead to errors during the execution and usage of Odoo in your development environment.
Step 9: Open the Odoo Project in PyCharm
Launch PyCharm Community Edition and follow these steps to open your Odoo project:
- From the welcome screen, click on “Open”.
- Navigate to your home directory and select the odoo16 folder.
- Click “OK” to load the project into PyCharm.
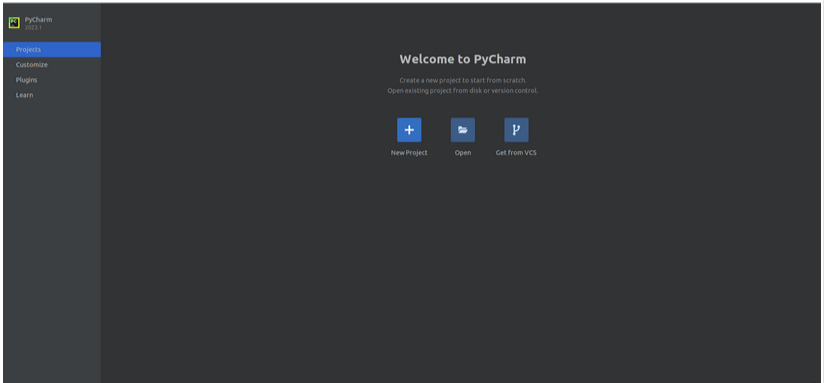
After the project loads in PyCharm, you may see a dialog box prompting you to configure a Python interpreter or set up a virtual environment, similar to the one shown in the screenshot below.
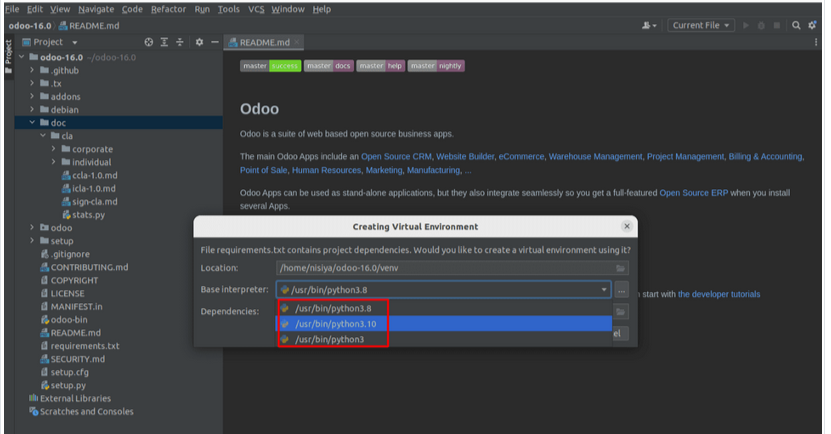
Python3.10 interpreter is supported by Ubuntu 22.04 by default, but Python 3.8 is also available.
Step 10: Create odoo.conf File Inside the odoo16 Directory
To configure Odoo, you’ll need to create a configuration file named odoo.conf within the root of your odoo16 directory. Follow these steps in PyCharm:
- Right-click on the odoo16 directory.
- Select New → File.
- Name the file odoo.conf and click OK.
Paste the following configuration block into the newly created file:
					[options]
; This is the password that allows database operations:
admin_passwd = admin
db_host = localhost
db_port = 5432
db_user = odoo16
db_password = your_password_here
addons_path = addons
xmlrpc_port = 8069
Note: Replace your_password_here with the actual password you set for the odoo16 PostgreSQL user during the earlier step.
If you have custom modules in a separate directory, you can include that path as well—just separate multiple paths with commas.
Example,
addons_path = /home/youruser/odoo16/odoo/addons, /home/youruser/odoo16/custom_addons
Step 11: Add Python Interpreter
To run Odoo from within PyCharm, you need to configure a Python interpreter for the project. Follow the steps below:
- Navigate to File → Settings (or Ctrl + Alt + S).
- In the left sidebar, go to Project: odoo16 → Python Interpreter.
- Click on the gear icon ⚙️ next to the interpreter dropdown.
- Select Add… from the menu, as shown in the screenshot below.
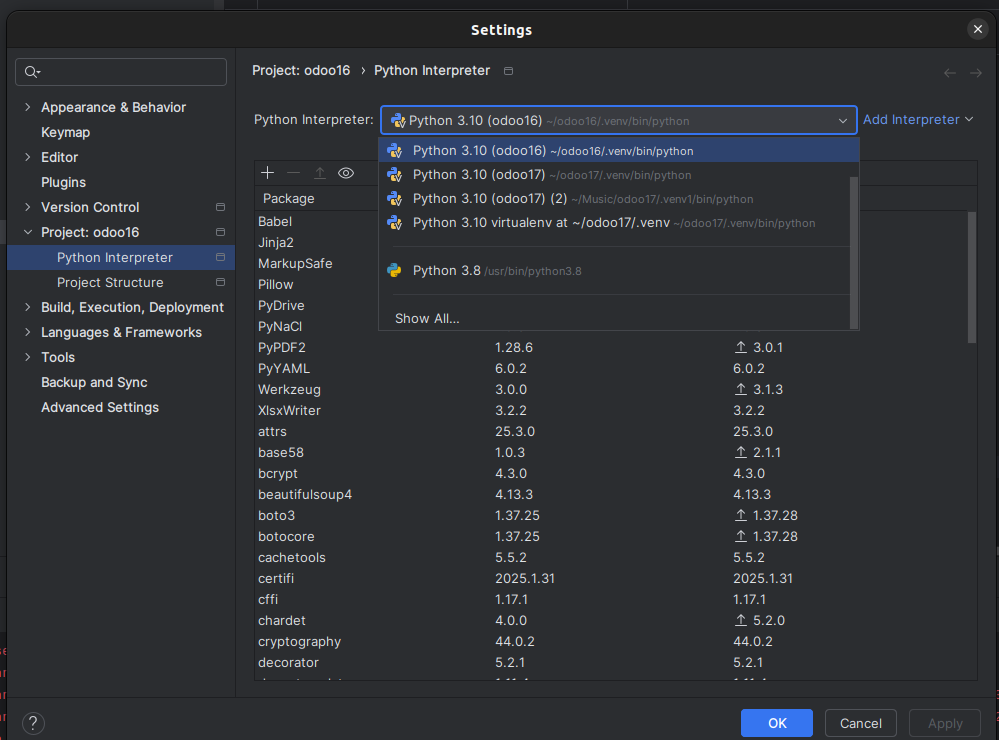
Since there is no interpreter to add to this screenshot, we must do it from the ‘Add Interpreter’ menu.
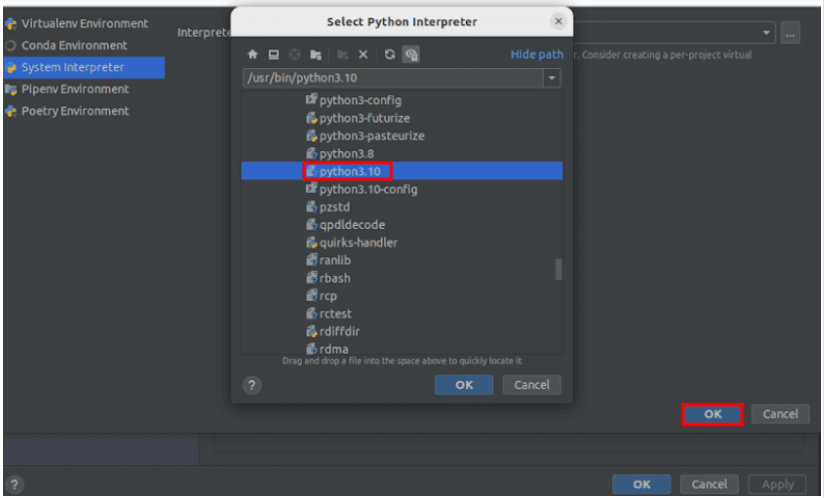
We have already covered the fact that Python 3.10 and Python 3.8 are both supported by Ubuntu 22.04. Therefore, set up the interpreter to use Python 3.10.
Step 12: Add Project configuration in Pycharm
Go to – Current File> Edit Configurations
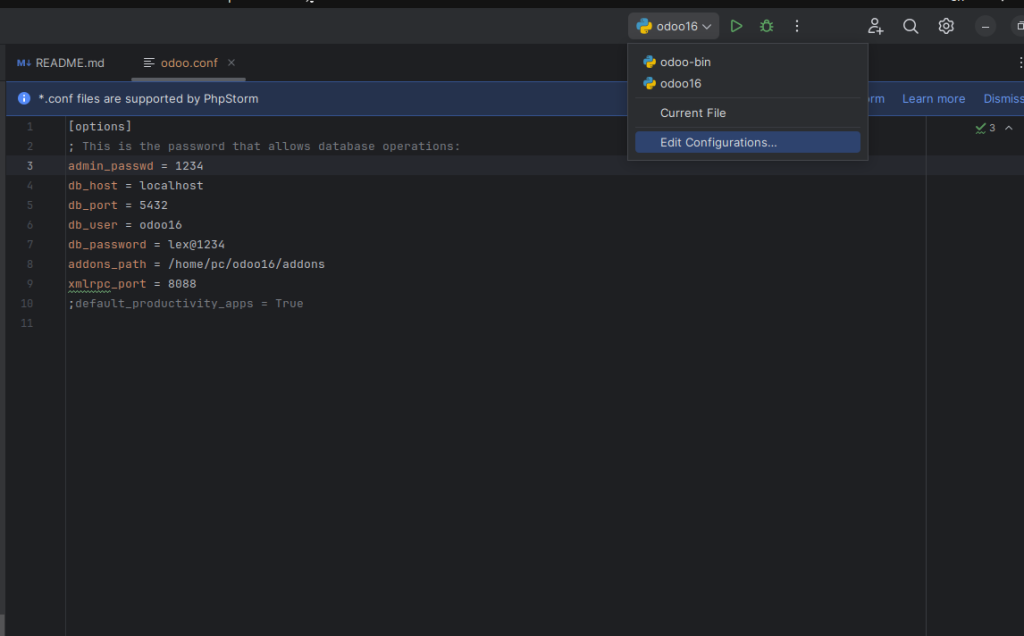
- Click the + (Add) button located in the upper-left corner of the window.
- From the list of available templates, select Python.
Once selected, fill in the required fields as shown in the screenshot:
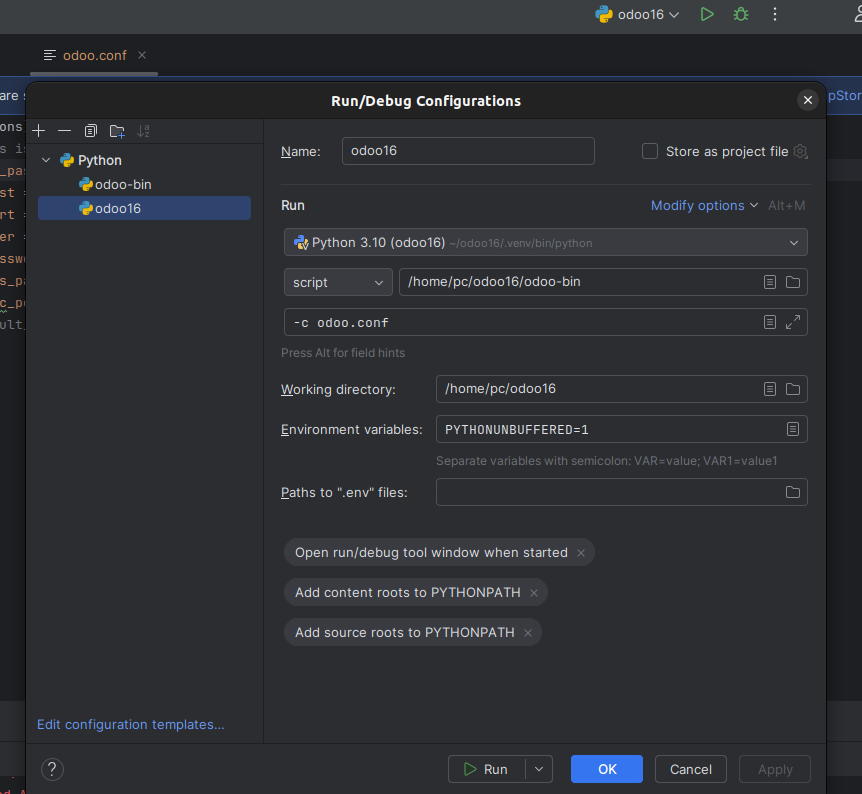
Name: you can provide any name to identify the configuration.
Script Path:
Select the odoo-bin file from the odoo16 directory (not odoo15, if you’re working with Odoo 16). This is the main entry point for running the Odoo server.
Parameters:
You can specify the parameters required to launch Odoo here. At minimum, provide the path to your configuration file using the -c option:
Python Interpreter:
This field should already be populated with the interpreter you configured in the previous step. If not, manually select the correct Python 3 interpreter associated with your project
Step 13: Test Run Odoo 16
With all configurations in place, you can now test your setup.
Click the Run ▶️ button in the top-right corner of PyCharm. If everything is configured correctly, the Odoo server should start, and you’ll see logs in the console indicating that the server is running.
You can then open a browser and go to:
http://localhost:8069
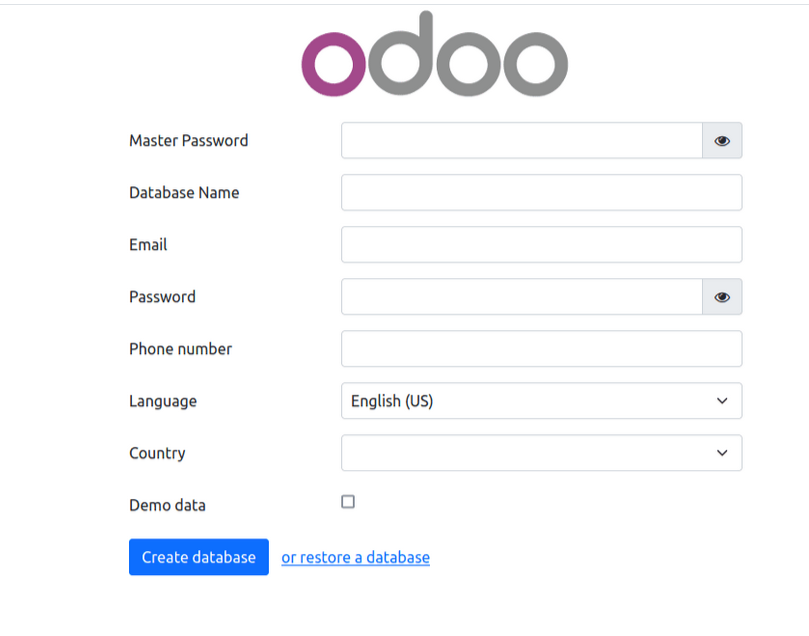
If all your configuration was successful, the browser will navigate to the database manager
Odoo as shown below:
Efficiently Setting Up Odoo 16 Development with PyCharm on Ubuntu 22.04
Setting up the Odoo 16 development environment on Ubuntu 22.04 using PyCharm offers a dependable and efficient platform for developing and customizing Odoo modules. With the correct Python setup, essential dependencies, and a structured project configuration, PyCharm is a powerful tool for streamlining and improving your development workflow.
By following the steps outlined, you’re ready to begin developing, debugging, and extending Odoo modules confidently.