The Odoo 18 manage checkout policy plays a critical role in shaping your online store’s user experience, conversion rate, and operational control. Whether running a B2B store or a direct-to-consumer eCommerce platform, configuring the right Odoo 18 checkout policy can enhance customer satisfaction and operational efficiency.
From Odoo guest checkout options to Odoo 18 customer portal customization and from Odoo website checkout configuration to Odoo 18 portal access management, businesses must understand the full scope of Odoo’s capabilities to deliver a seamless eCommerce journey.
At Netilligence, we specialize in helping businesses streamline their digital commerce by unlocking the power of Odoo 18 eCommerce settings. This guide will walk you through configuring checkout policies, customizing the customer portal, and maximizing Odoo’s potential.
Understanding the Manage Checkout Policy Settings
The Odoo 18 checkout policy determines whether users must log in before purchasing or are allowed to proceed as guests. This impacts cart abandonment rates, data collection, and post-sales services.
Checkout Policy Options:
- Free Checkout (Guest Checkout): No login is required; it is quick and frictionless.
- Account Required: Forces login or account creation, ideal for B2B.
- Optional Login: Combines the best of both worlds.
Proper configuration of the Odoo website checkout setup improves user experience and aligns with your business model.
Customizing the Odoo Customer Portal for Better Engagement
The Odoo customer portal is where users access their orders, invoices, deliveries, support tickets, and more. With Odoo 18 customer portal customization, you can reflect your brand identity and add features specific to your customer needs.
What You Can Customize:
- Portal layout and design
- Available tabs (Orders, Invoices, Projects, Helpdesk)
- Access controls and user rights
- Customer communication tools
When integrated correctly, the Odoo 18 customer portal boosts trust and reduces support requests.
Enabling Odoo Guest Checkout for Frictionless Experience
While account-based checkouts offer detailed analytics, not all customers want to register. Enabling Odoo guest checkout supports faster transactions and caters to casual or first-time buyers.
Benefits of Guest Checkout:
- Reduced cart abandonment
- Quicker buying process
- Ideal for flash sales or promotions
Steps to Configure Checkout Policy in Odoo 8 Website Module
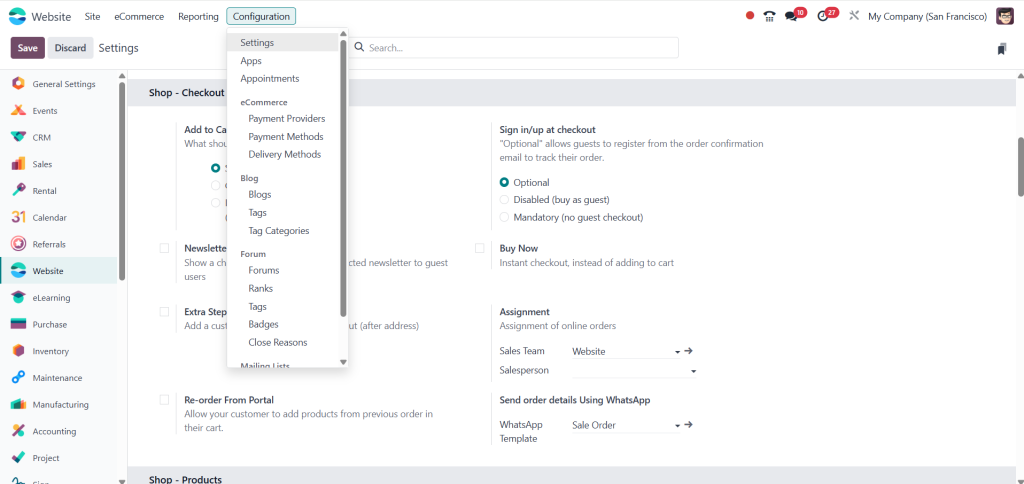
Step: 1. Access the Website Settings
- Go to the Website module.
- Navigate to Configuration > Settings.
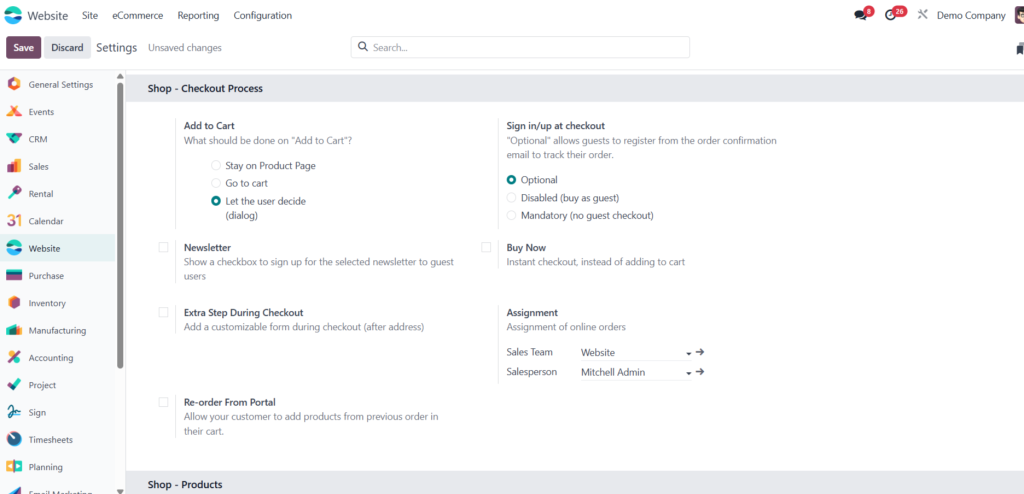
Step: 2. Choose a Checkout Policy
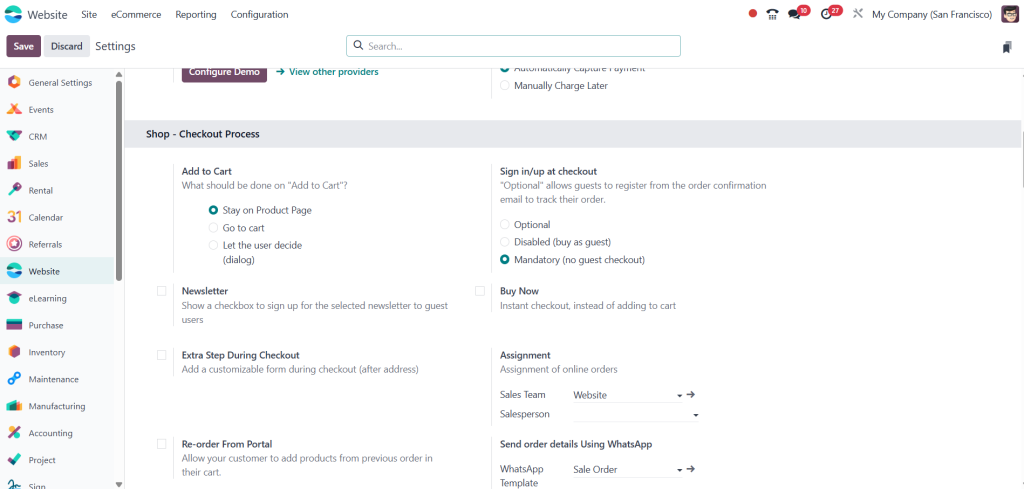
Under the Shop Checkout Process section, choose one of the following options:
- Optional (Allows guests to checkout and later register via order confirmation email).
- Disabled (Buy as a guest only – no registration or login required).
- Mandatory (Sign in required – guest checkout is not allowed).
Testing Each Checkout Policy:
Step: 3 OPTIONAL Checkout Policy
- Set policy to Optional and Save changes.
2. Log out from the admin account.
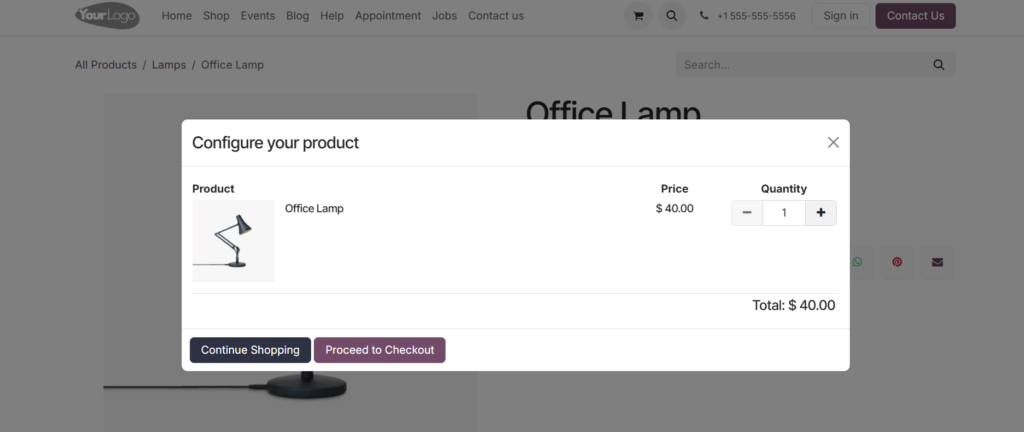
3. Go to Shop, select an item, and add to cart.
4. Proceed to checkout without signing in.
5. Enter customer details (name, phone, email, etc.).
6. Choose a payment method and complete the payment.
7. Result: Checkout completed without account login, with an option to register later.
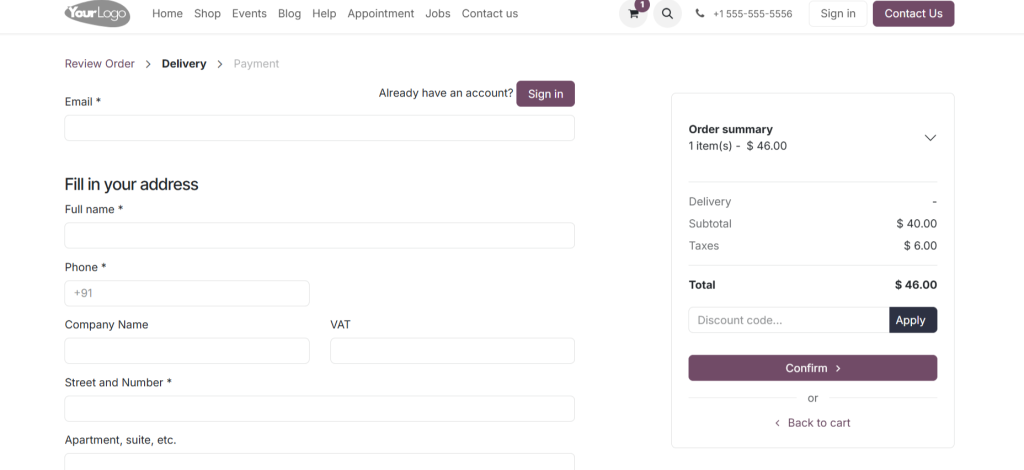
Step: 4 DISABLED Checkout Policy (Guest Checkout Only)
- Set policy to Disabled (Buy as Guest) and Save changes.
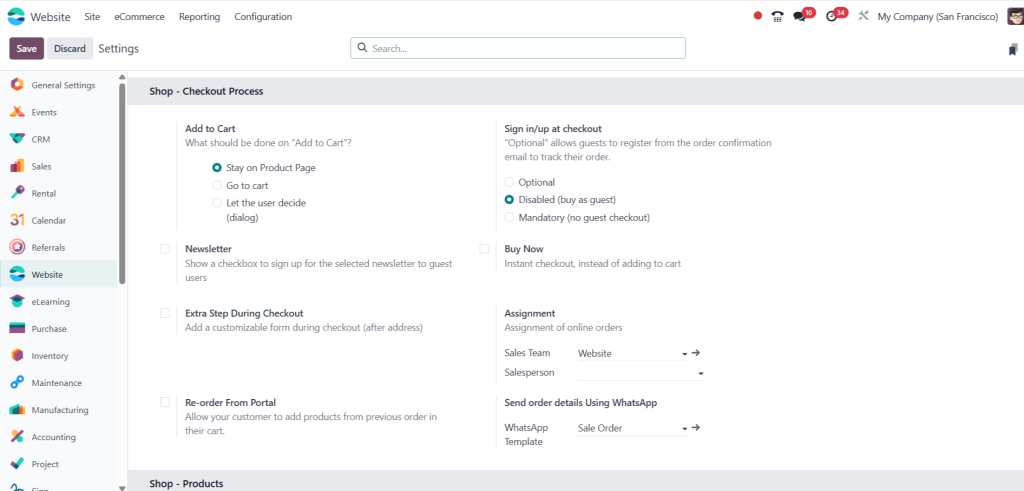
2. Again, log out from admin.
3. Visit the Shop, add an item to the cart, and go to checkout.
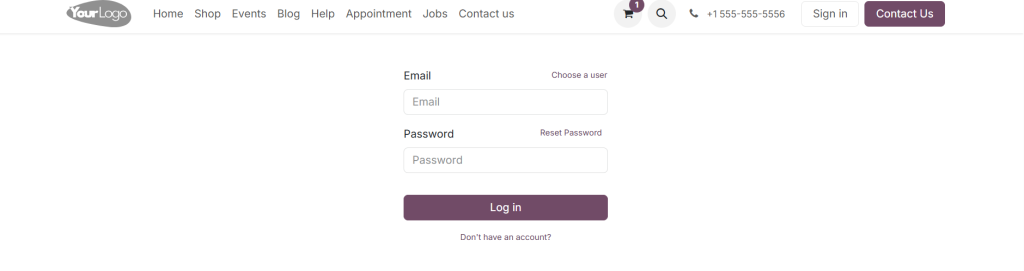
4. Enter the required guest information and proceed with payment.
5. Result: Only guest checkout is allowed, no login or registration required.
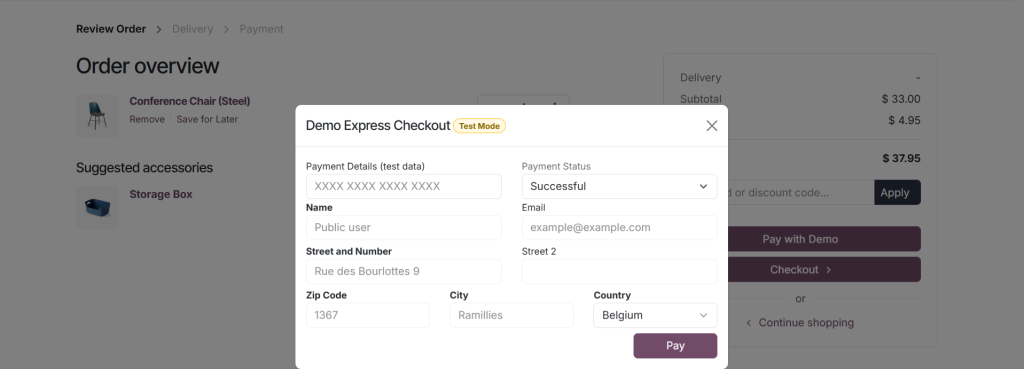
Step: 5 MANDATORY Checkout Policy (No Guest Checkout)
- Set policy to Mandatory (No Guest Checkout) and Save.
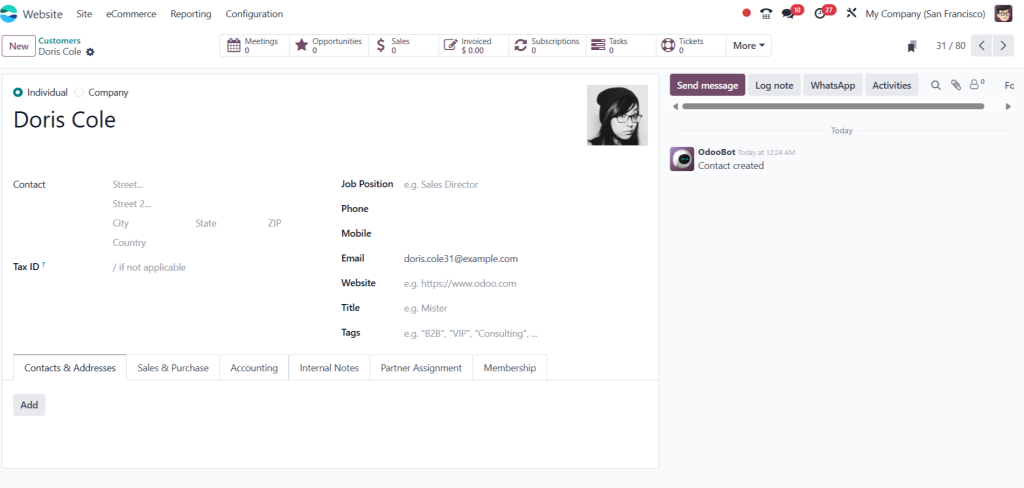
2. Create or select a customer (e.g., Doris) in Odoo backend.
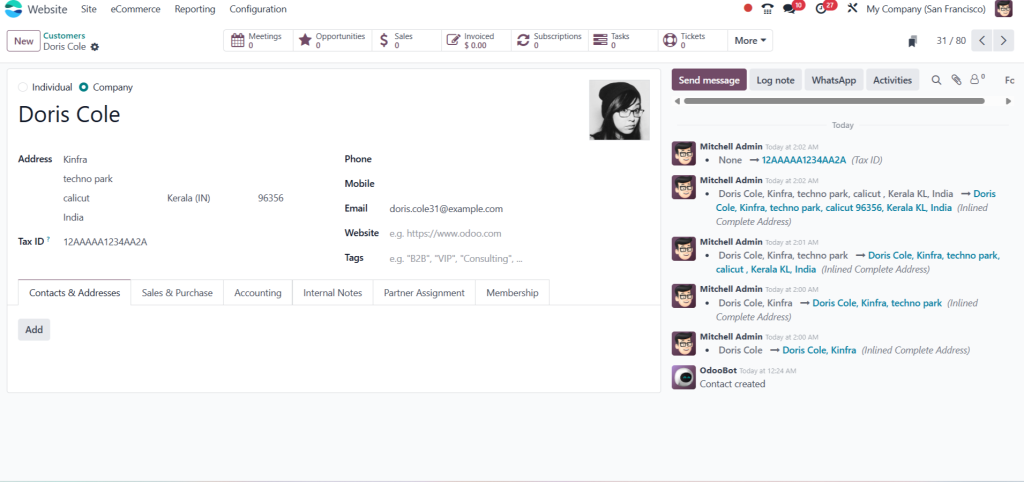
3. Provide all required B2B details: address, country, state, city, zip code, tax (VAT) number.
4. Click on Grant Portal Access to send login credentials to the customer.
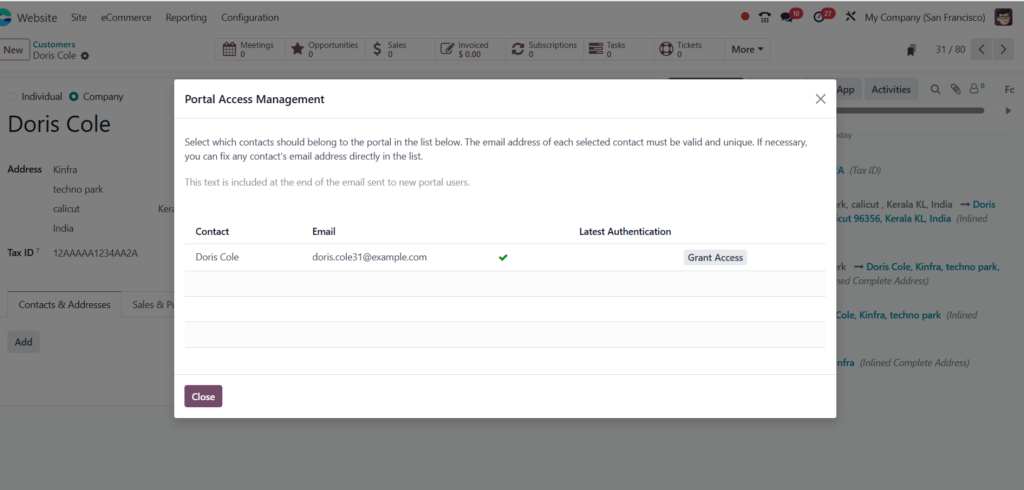
5. Assign an email and set a password manually (optional).
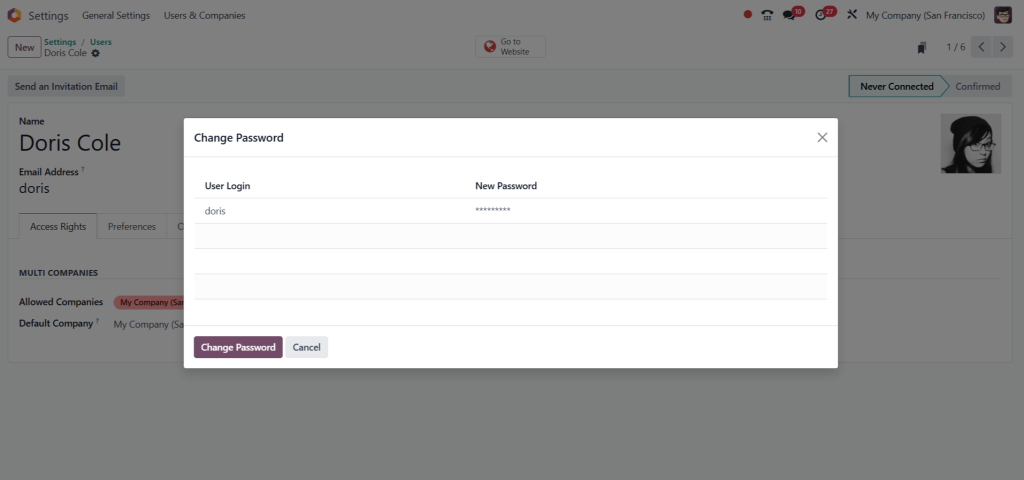
6. Log out as admin and sign in as the customer.
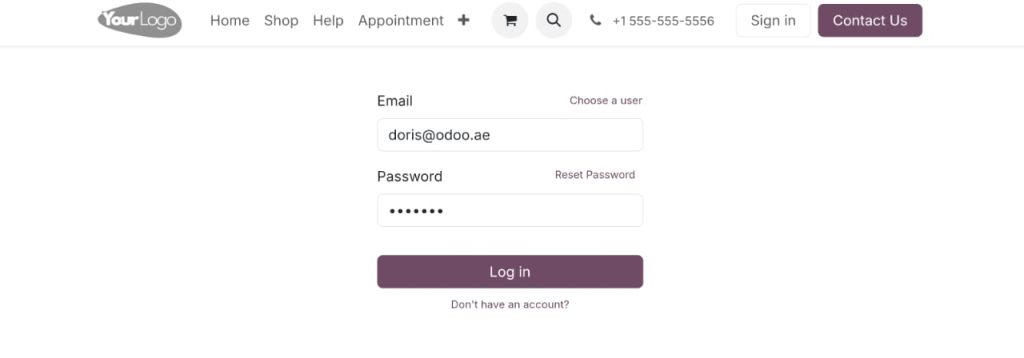
7. Proceed to the Shop, add a product, and go through checkout.
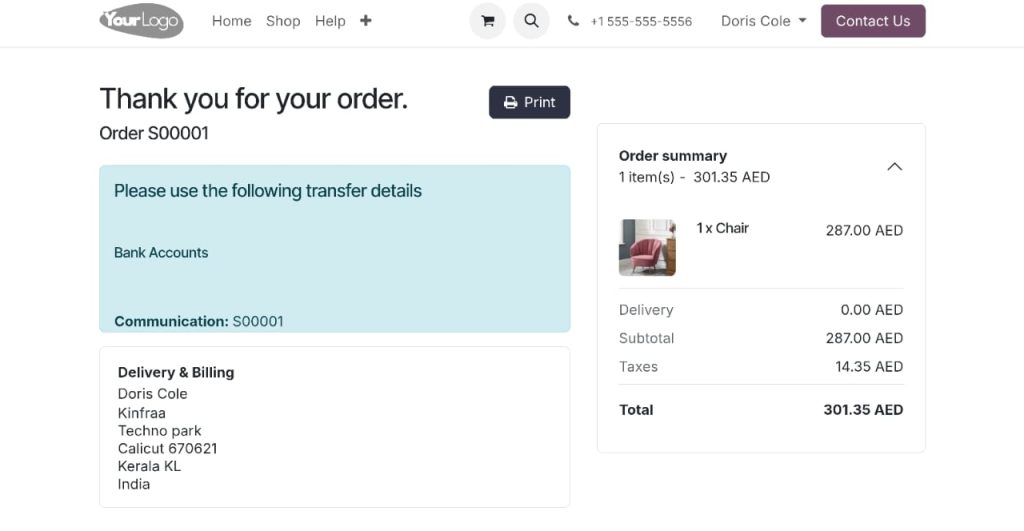
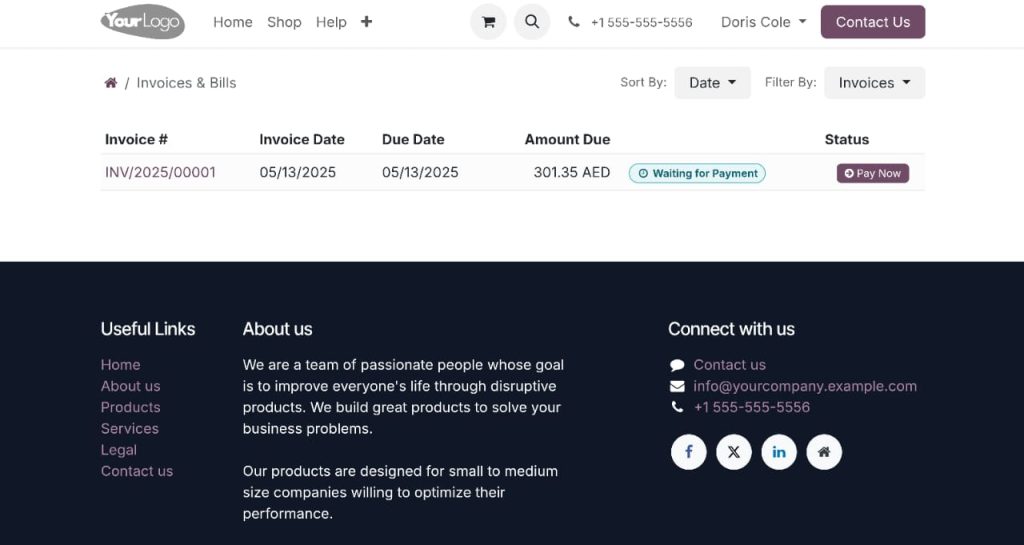
8. Result: Checkout only allowed after sign-in, enforcing mandatory login.
Advanced Odoo Website Checkout Configuration Tips
Fine-tuning your Odoo website checkout configuration ensures a smoother experience from cart to confirmation.
Advanced Configurations:
- Add shipping methods and conditions.
- Enable discount codes
- Automate tax calculation
- Integrate with payment gateways (Stripe, PayPal, etc.)
Combining a firm Odoo 18 checkout policy with a robust configuration ensures you minimize customer drop-offs and operational delays.
Odoo 18 Portal Access Management for B2B & Enterprise Control
If you manage B2B clients, Odoo 18 portal access management becomes essential for controlling who sees what, assigning roles, and managing user permissions.
Features Include:
- Role-based access to documents
- Manual or automatic user approval
- Secure data sharing
- Multi-user access within one client account
You can control portal access via:
Settings > Users & Companies > Portal Users
Combining access control with a well-structured Odoo 18 customer portal will streamline transparency and security.